

Earlier this year, we shared a method for fixing broken PanPastels and a handful of readers asked us if there was a similar way to repair broken soft pastels. We decided to explore a couple of techniques that could potentially, in theory, repair broken pastel sticks and see if they worked. This article outlines the processes I used in my experiments, the results along with some further hints and tips.
Many artists who use soft pastel sticks know the familiar feeling of opening their pastel box to find that some of the sticks inside have crumbled, or to be using their pastels only to feel them snap between their fingers. A broken pastel stick can sometimes still be used as smaller, separate chunks, but it can be a frustrating issue when the pieces are particularly small or have broken into dust. It’s a common problem, and unfortunately it is the price we pay to work with such a delicate and tactile material. But is there a way to repair broken soft pastels?

What Are Soft Pastels?
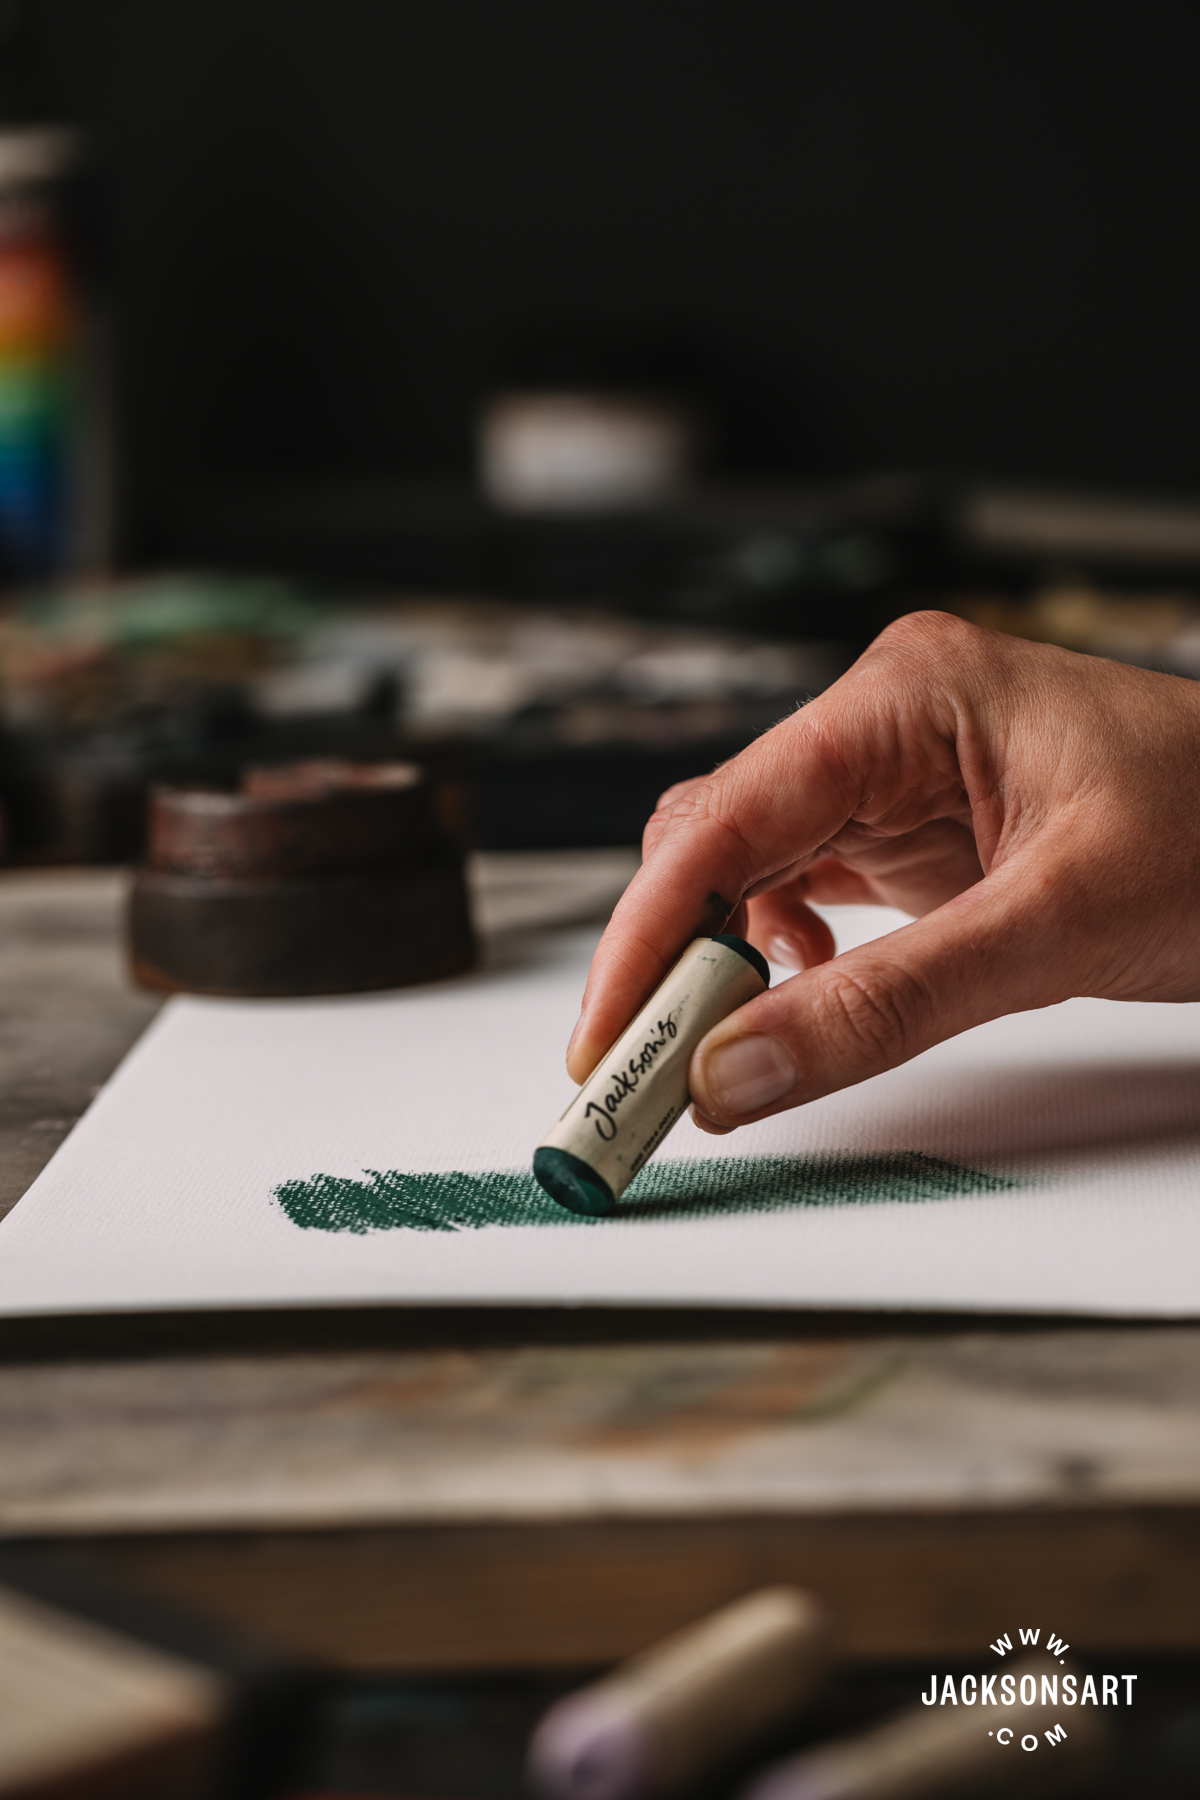
A soft pastel is a type of pastel that is made to be as soft as possible. For this article, we will be focussing on soft pastels that come in a stick form, however they also come as pencils and as PanPastels. The softness of pastel sticks allows for mixing colours directly on a surface as opposed to on a palette beforehand. Because of this, soft pastel sticks usually come in a large range of colours which are applied directly to the surface, and then blended using the artists’ fingers, a paper stump or colour shaper. The nature of this process creates an immediate and tactile painting experience.
What Are Soft Pastels Made Of?
To understand why soft pastel sticks might break, it helps to understand how and what they are made out of. Sticks of soft pastel are made by combining pure pigment powder with a clay binder and then fashioning it into sticks. Simply put, these kinds of soft pastels are lightly-compressed sticks of powder with the ability to create strokes of intense colour.
The best quality pastels are often made with single pigments meaning they will have the purest and brightest-looking colours. Their formulation will have the optimum proportion of pigment to binder, which means they will have less binder and more pigment. Although this results in the sticks creating more saturated hues, it actually means they are more likely to break or crumble as there is less binder holding the powder together.
Other soft pastel sticks – that are still of an excellent or mid-range quality – contain a higher concentration of binder and less pigment. Despite the less intense colour, this makes them less susceptible to breakage and crumbling. They are also generally more affordable. So if keeping your pastels intact for longer is more important to you than the pigment ratio, you may wish to opt for these types.
Can You Repair a Broken Soft Pastel Stick?
At the beginning of my research, I reached out to Unison Colour to see if they could offer an insight into fixing broken pastels. They said:
“For the paler colours, grinding them down, adding a little water and reshaping will do the job. Then by putting them in a warm place for one to two days they should be ready to use. The darker coloured pastels however are far trickier where drying becomes an issue, which can result in scratchy, hard pastels”
– Hazel, Quality Controller at Unison Colour
The process of grinding down and re-wetting the powders sounded similar to the technique we used in our aforementioned article How to Fix Broken PanPastels. However, rather than pressing the pastel mixture into a pan, Hazel suggests that it is possible to reshape the pastel back into a stick. And rather than using an isopropyl alcohol solution, like we did with the PanPastels, she suggests using water.
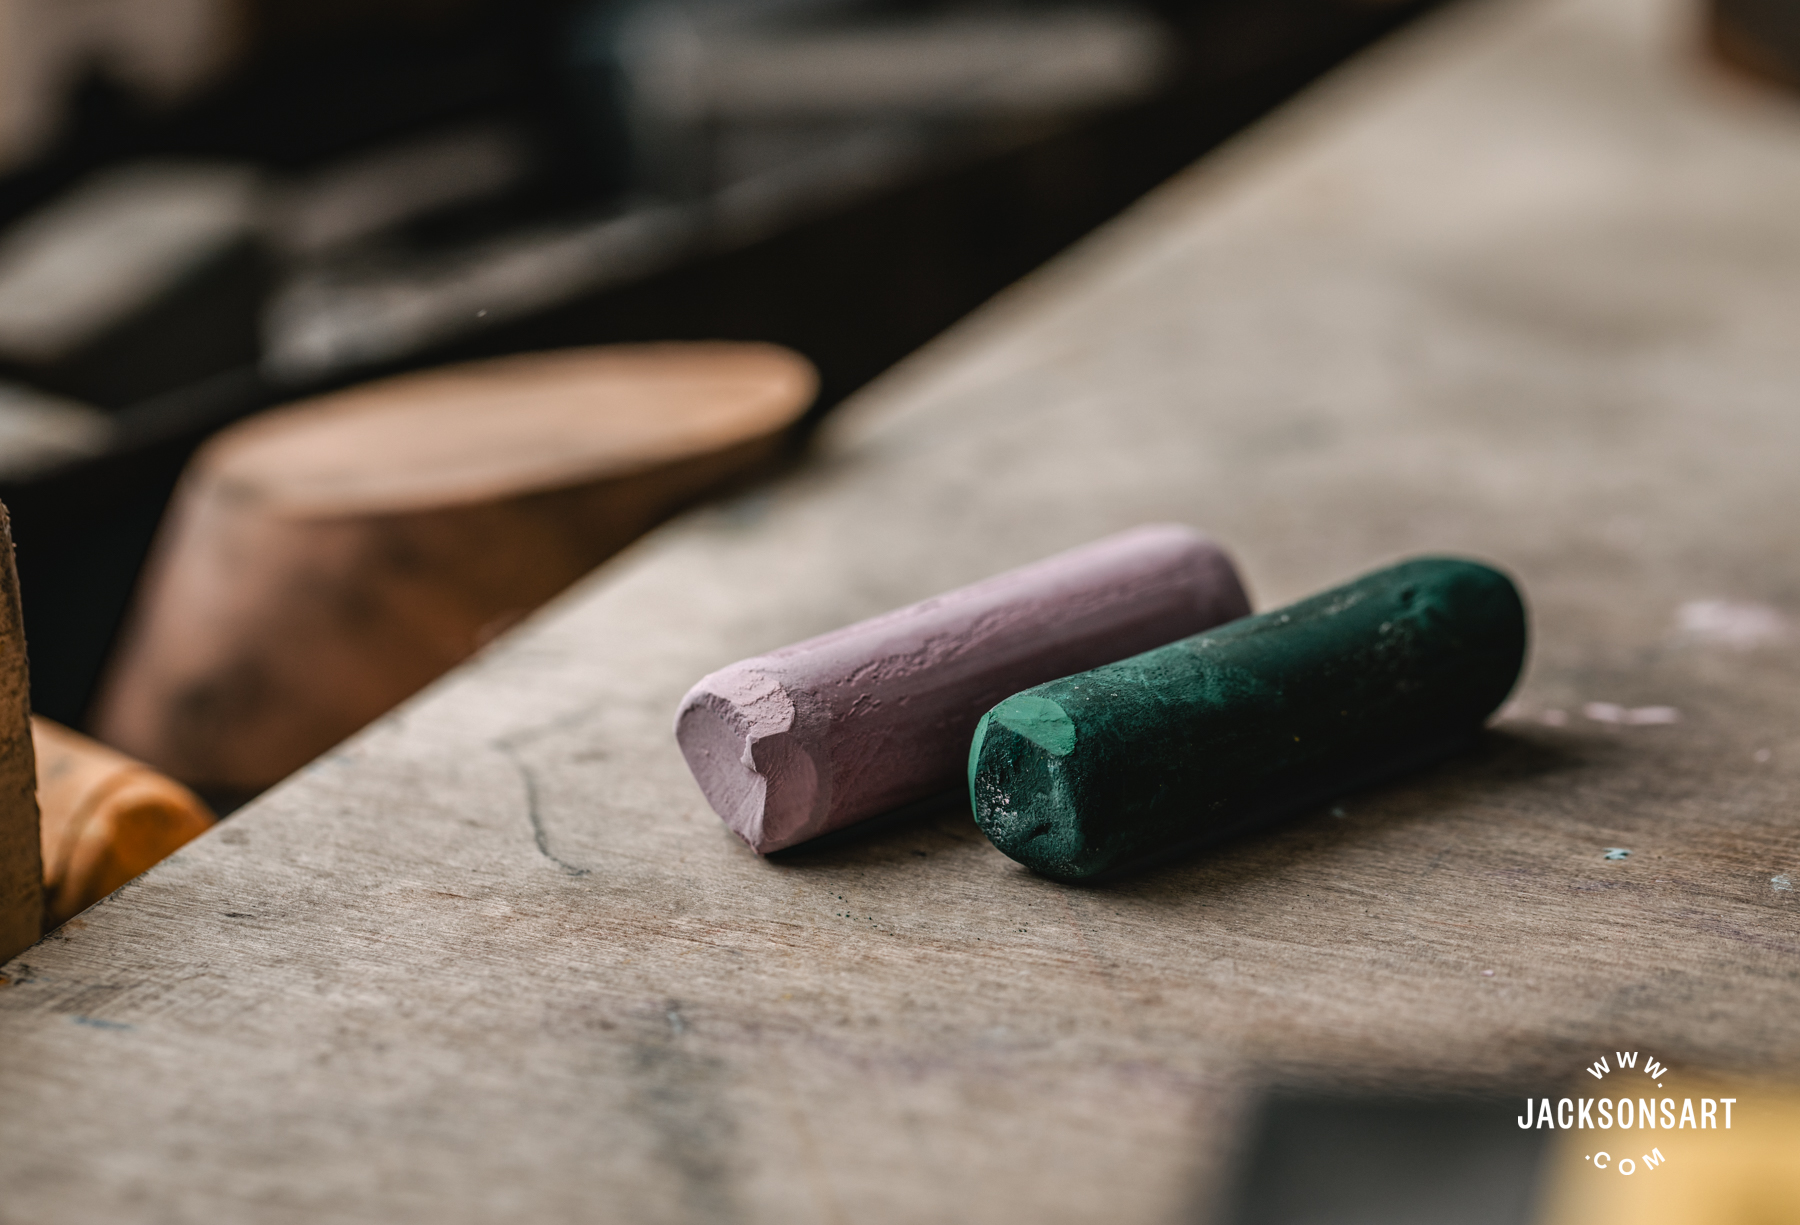
With Hazel’s comment in mind, I tried a method first using water, but I also decided to also try it again with an alcohol solution for comparison. For my tests I used Jackson’s Handmade Soft Pastels. These are high quality, artist grade pastels and there are 200 soft and bright colours in the range. I chose Violet Pink and Chromium Oxide Green. The reason for selecting these two shades was to see how a light-coloured pigment fared compared to the dark-coloured one. I also tried each twice, following the same process but altering which liquid I added to them – the alcohol and the water.
Below I outline the full process in more detail and the differing results of each experiment.
Method One – Using Water to Repair Broken Soft Pastels
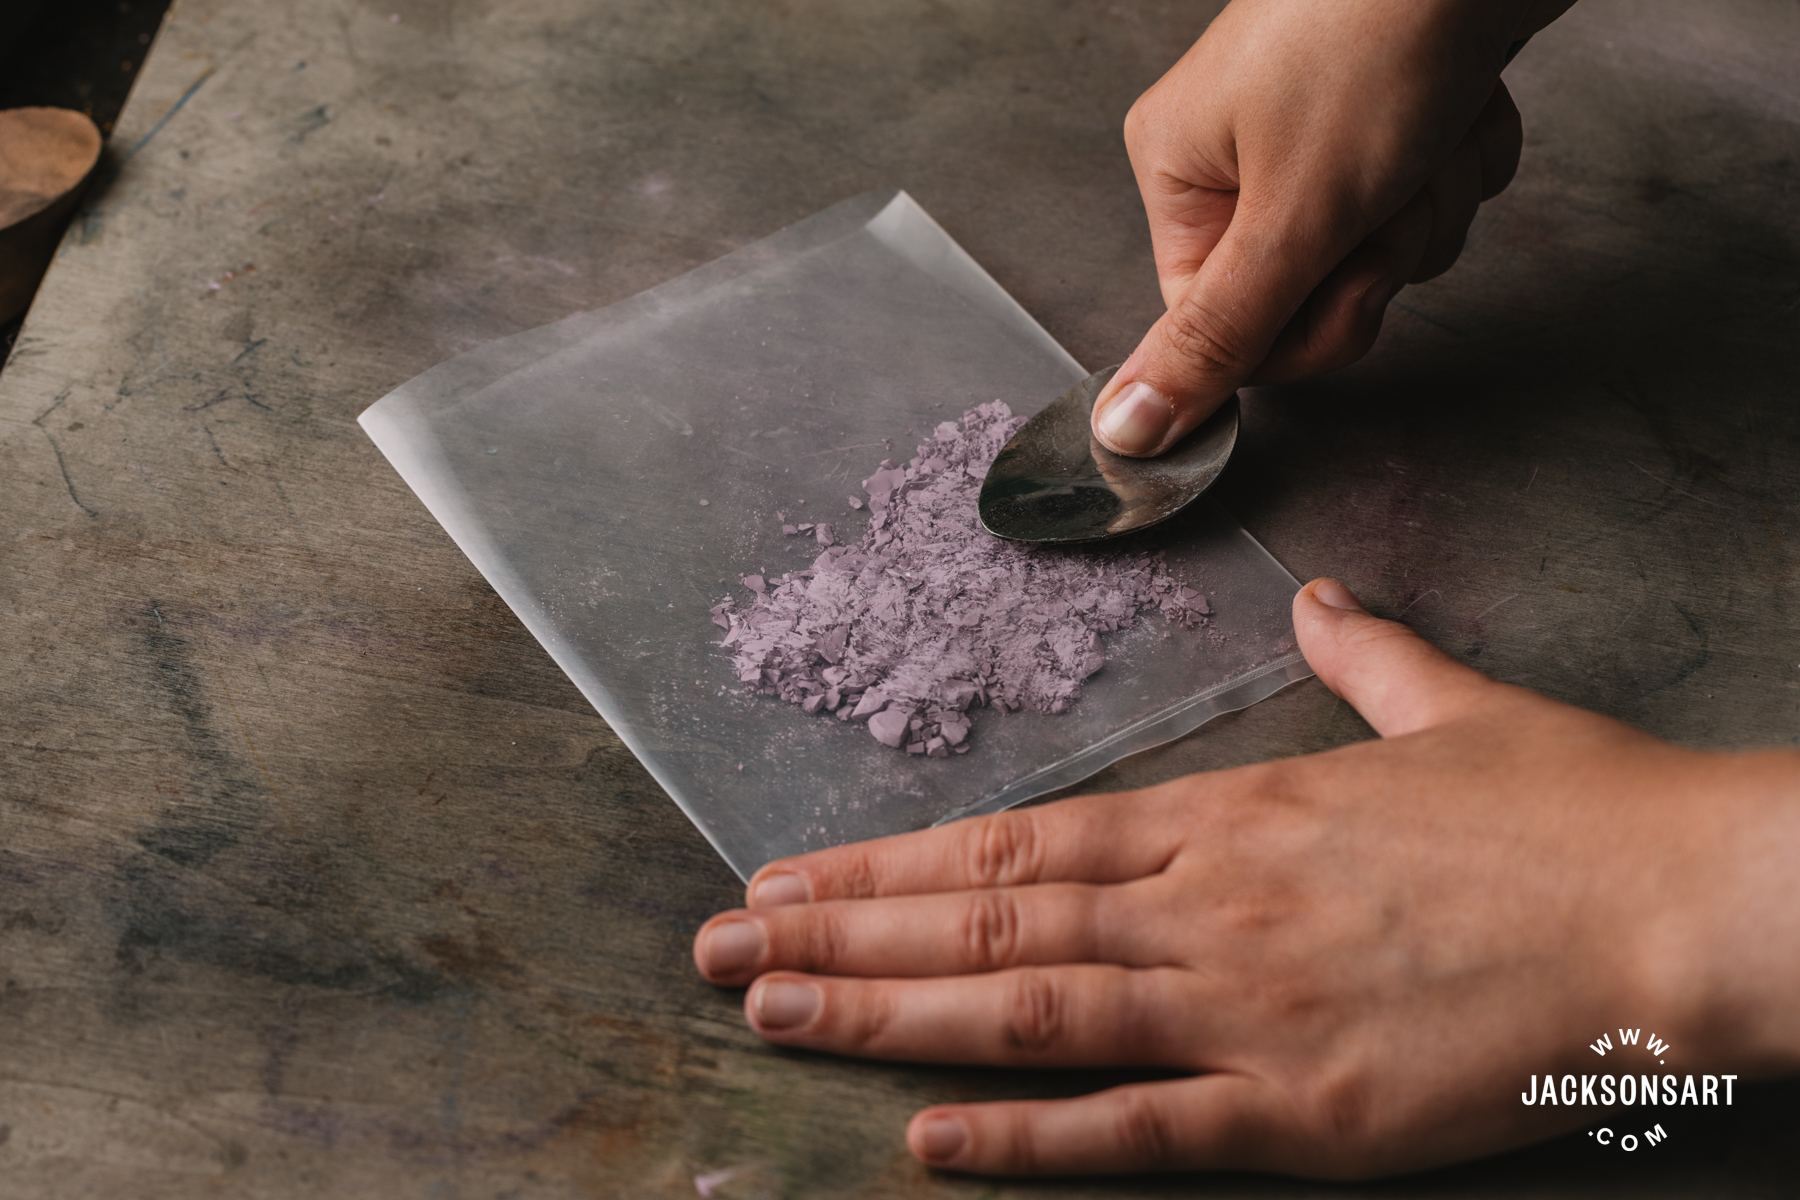
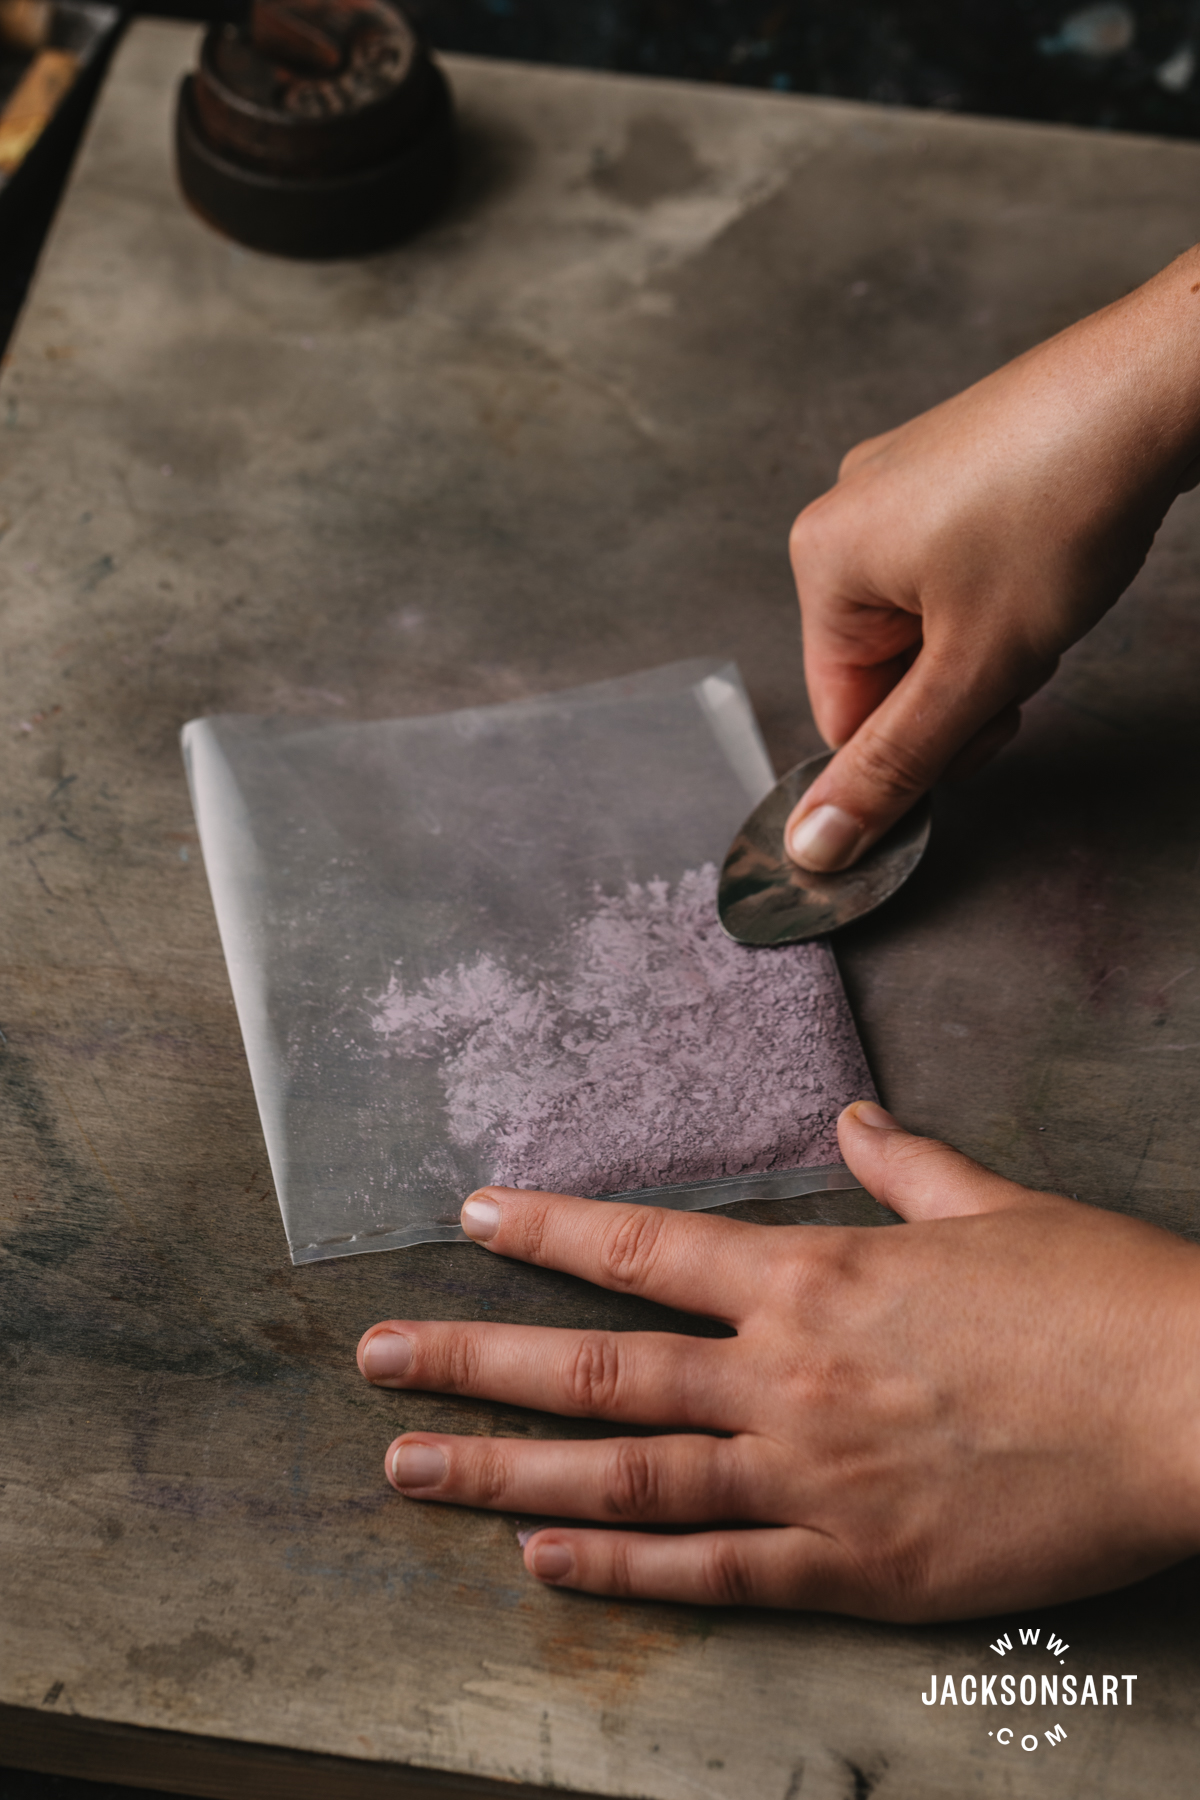
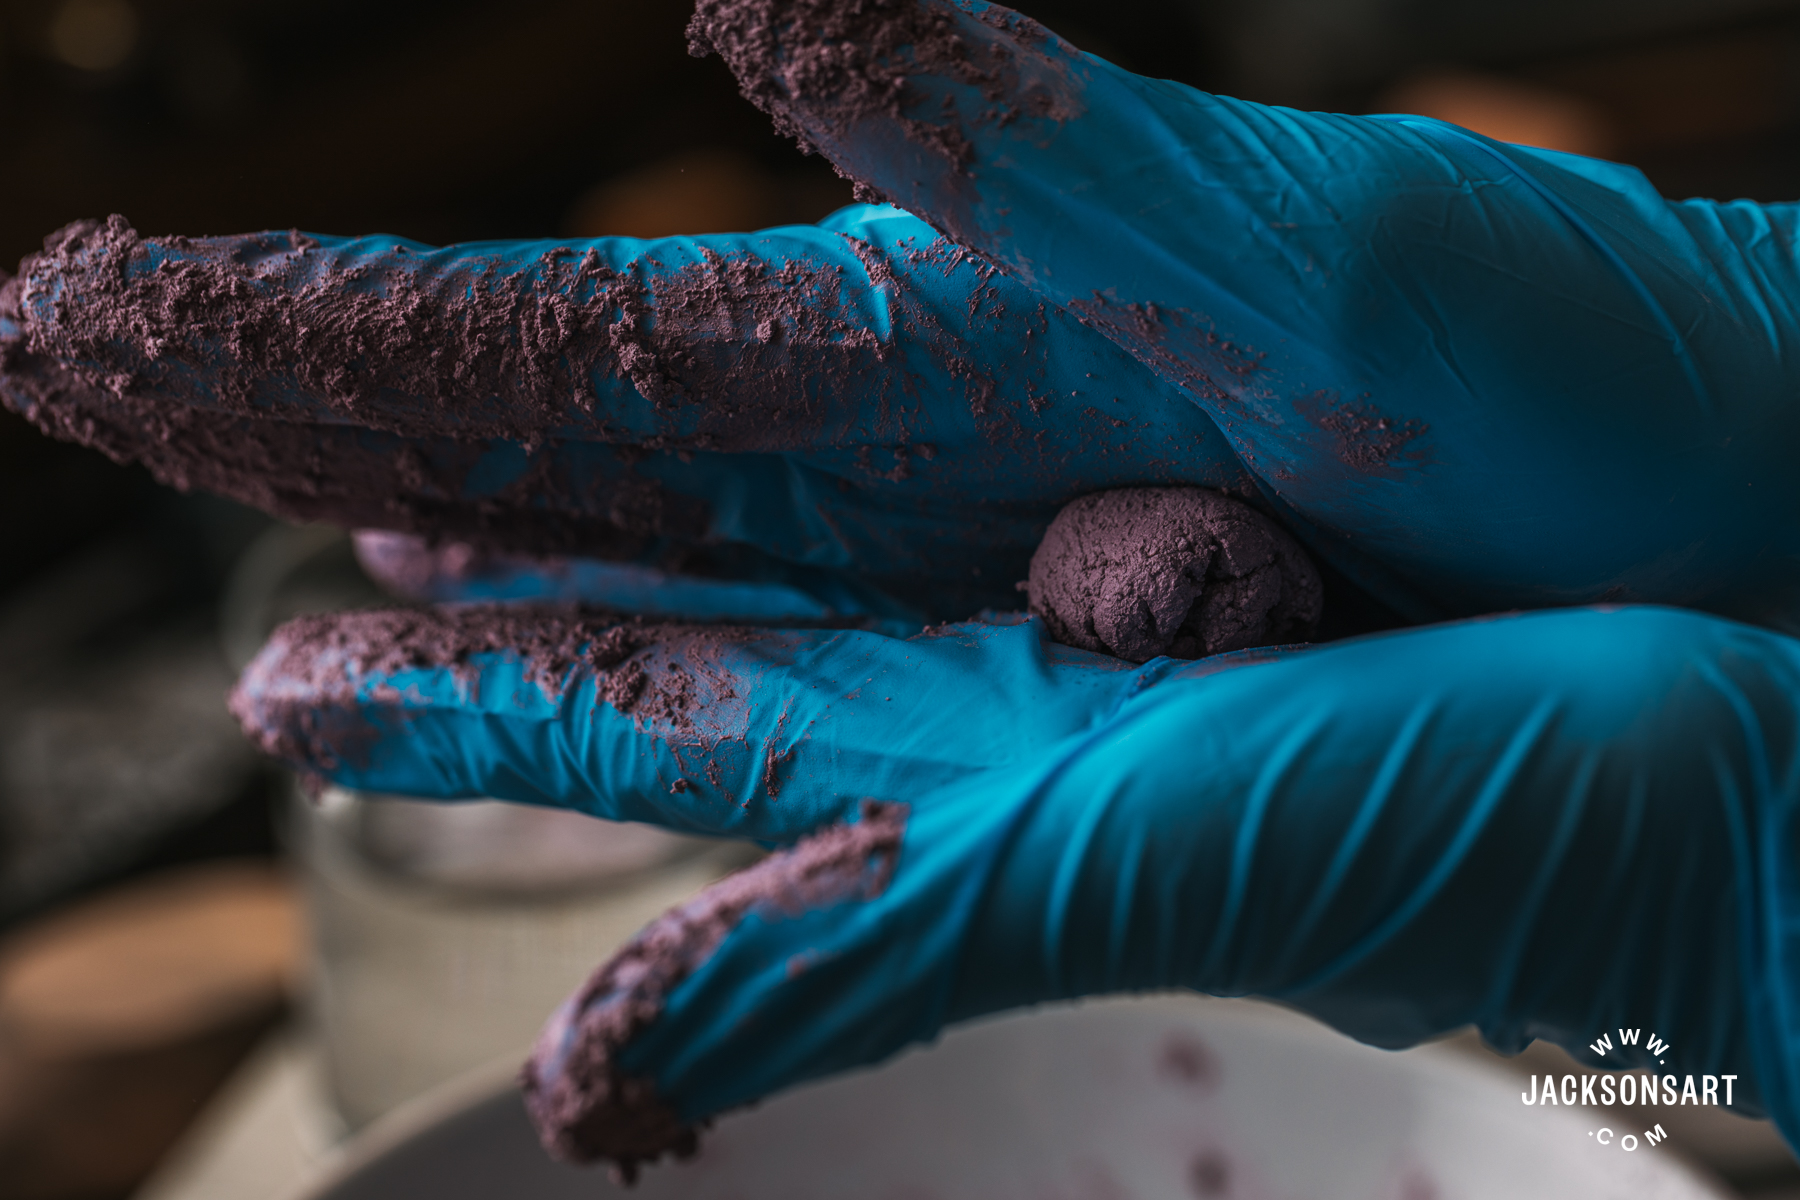
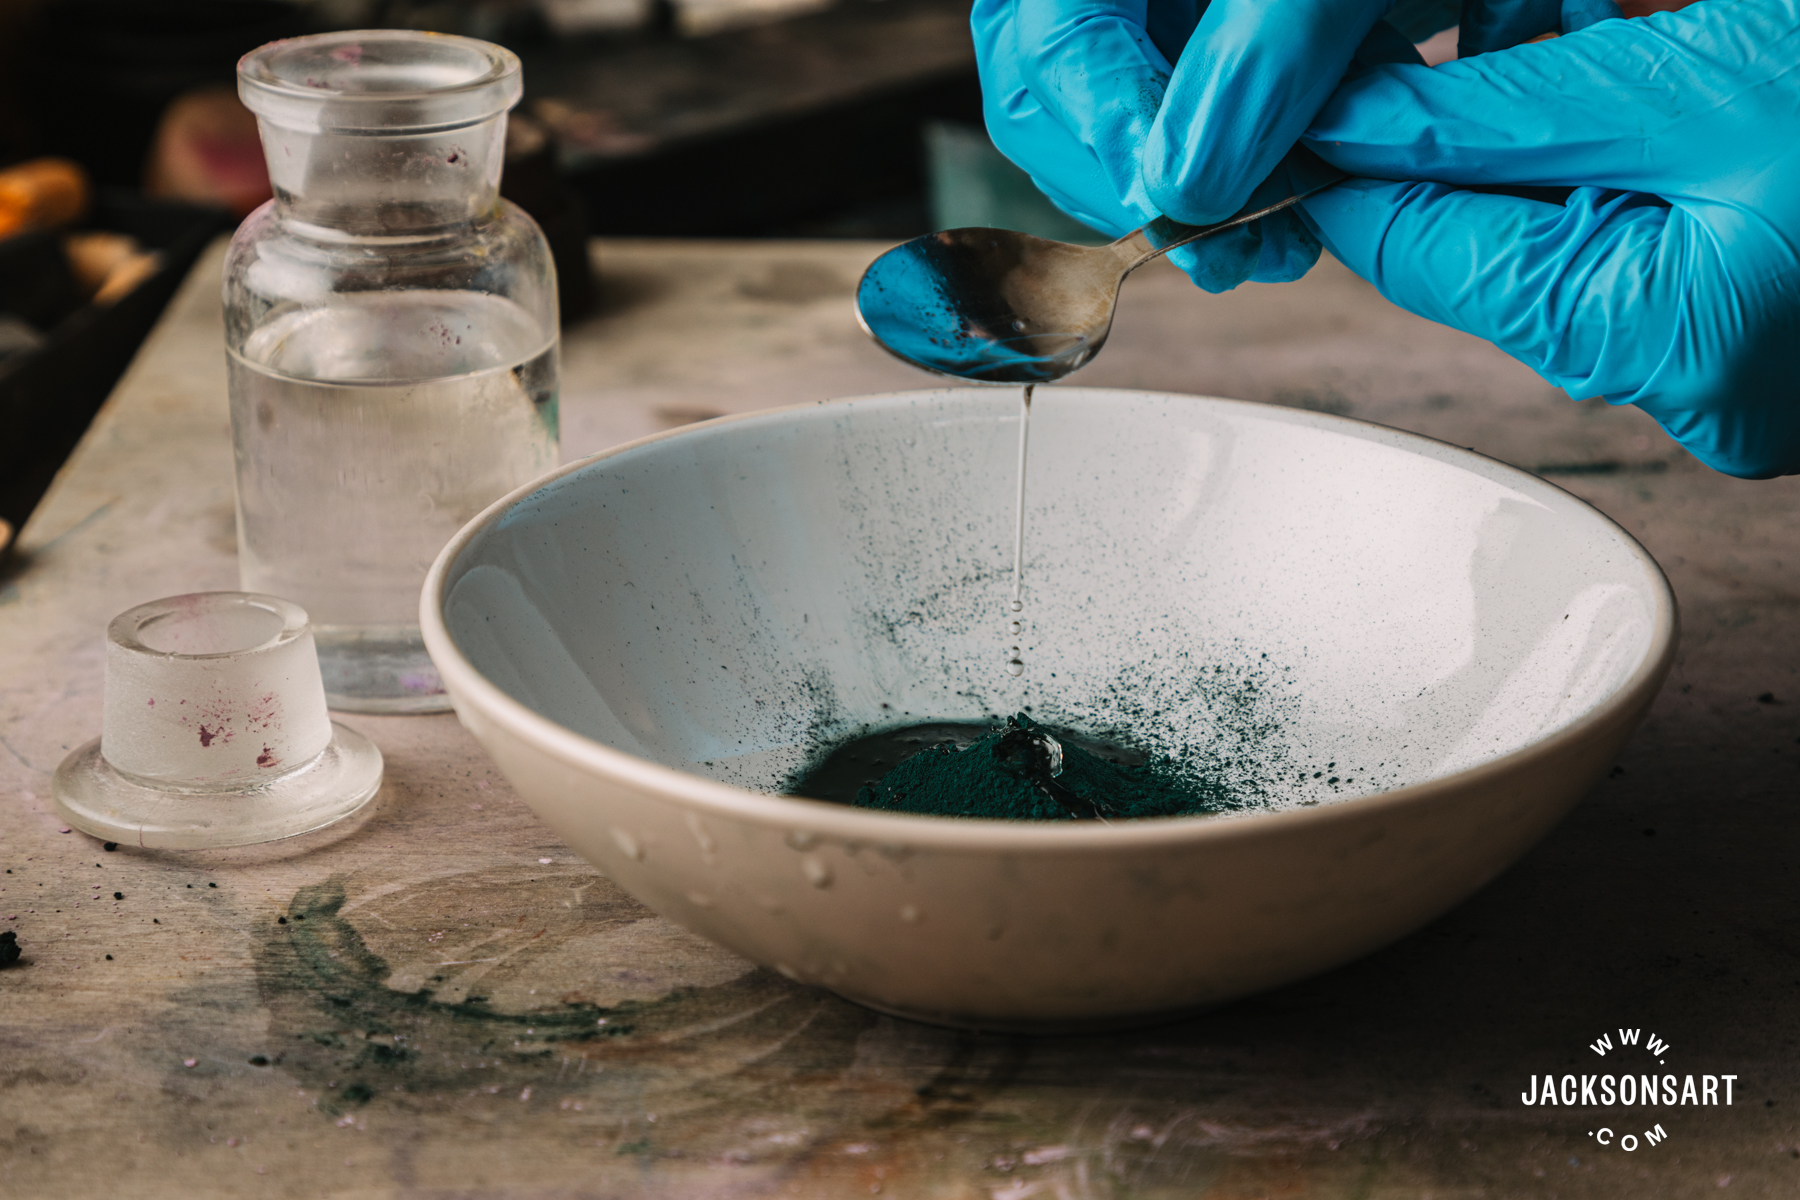
Step 1. I took the broken pastel and placed it into a clear plastic bag. I included all of the loose material, including any larger chunks of unbroken pastel as it gets crushed down and mixed in later.

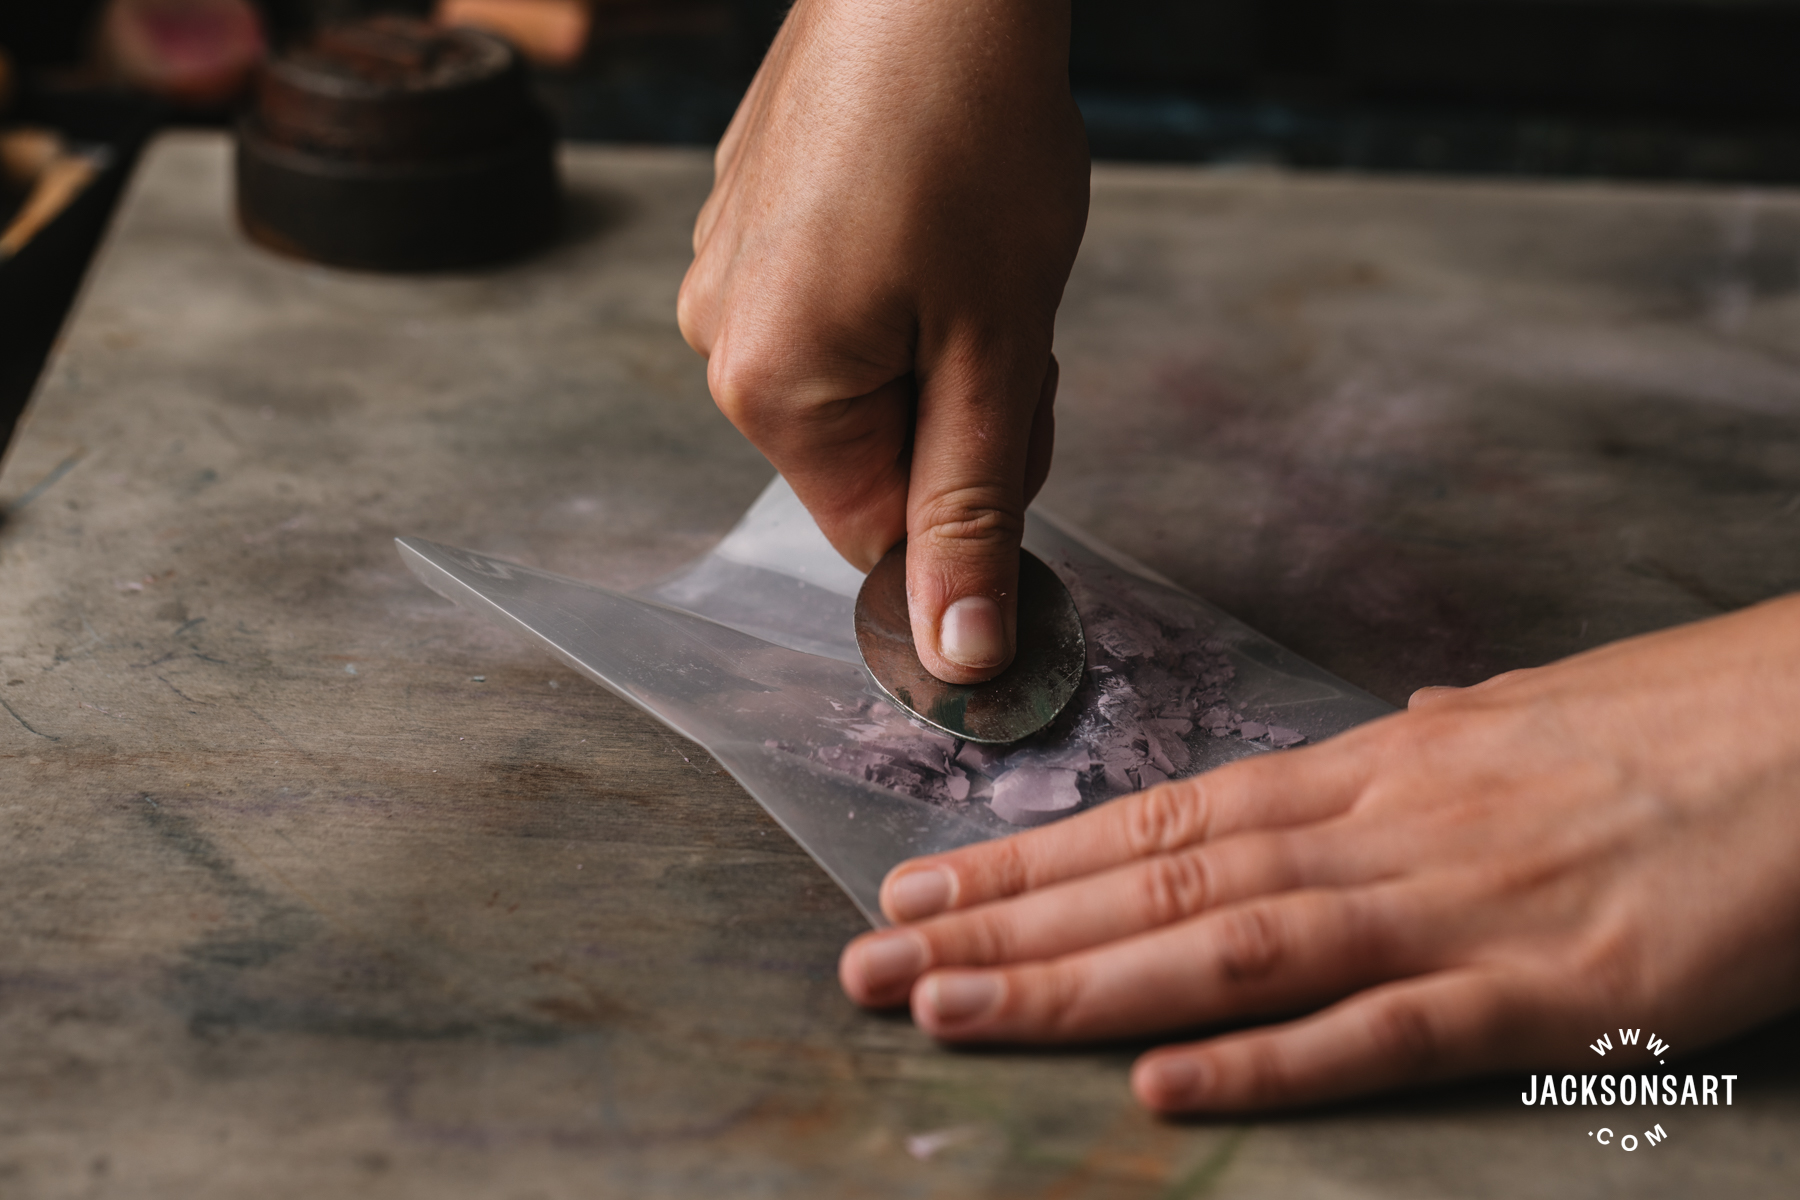
Step 2. Using a spoon over the top of the bag, I crushed the pastel as much as possible resulting in a fine dust. An alternative way to get the pastel into this state would be to use a pestle and mortar. I found that the Violet Pink pastel broke down easier whereas the Chromium Oxide Green was slightly tougher but ultimately resulted in a finer dust. Remember that as with all dust, pastel dust can be an irritant if you breathe it in, so if you try these methods at home, avoid blowing the dust away, as that will cause the dust to become airborne and can easily blow back. If you are particularly allergic or sensitive to dust, wearing a dust mask is recommended.
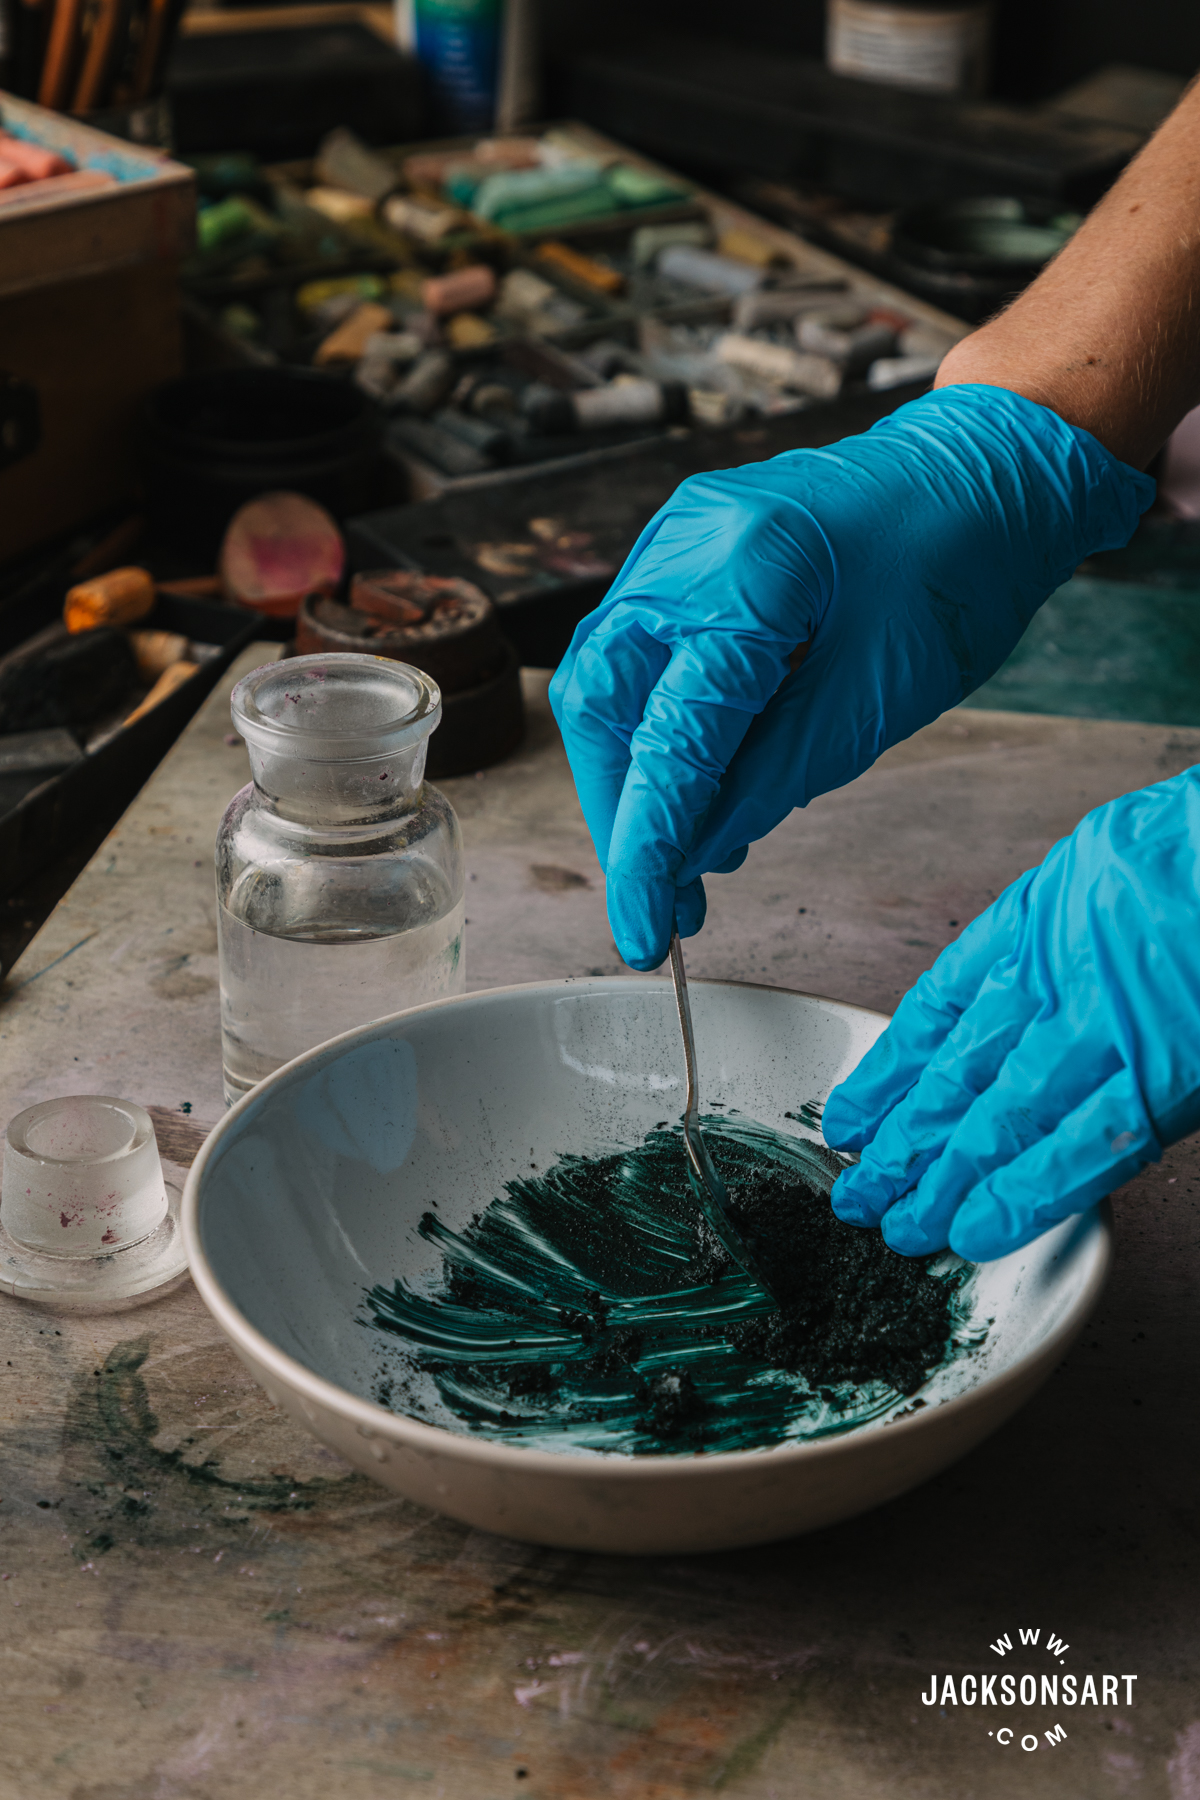
Step 3. I then placed the dust into a container and added a few teaspoons of water. The amount of water needed may change depending on the size of the soft pastel stick or the type of soft pastel. I added water gradually – one teaspoon at a time – to ensure the solution didn’t become too runny. I was aiming for a thick paste.

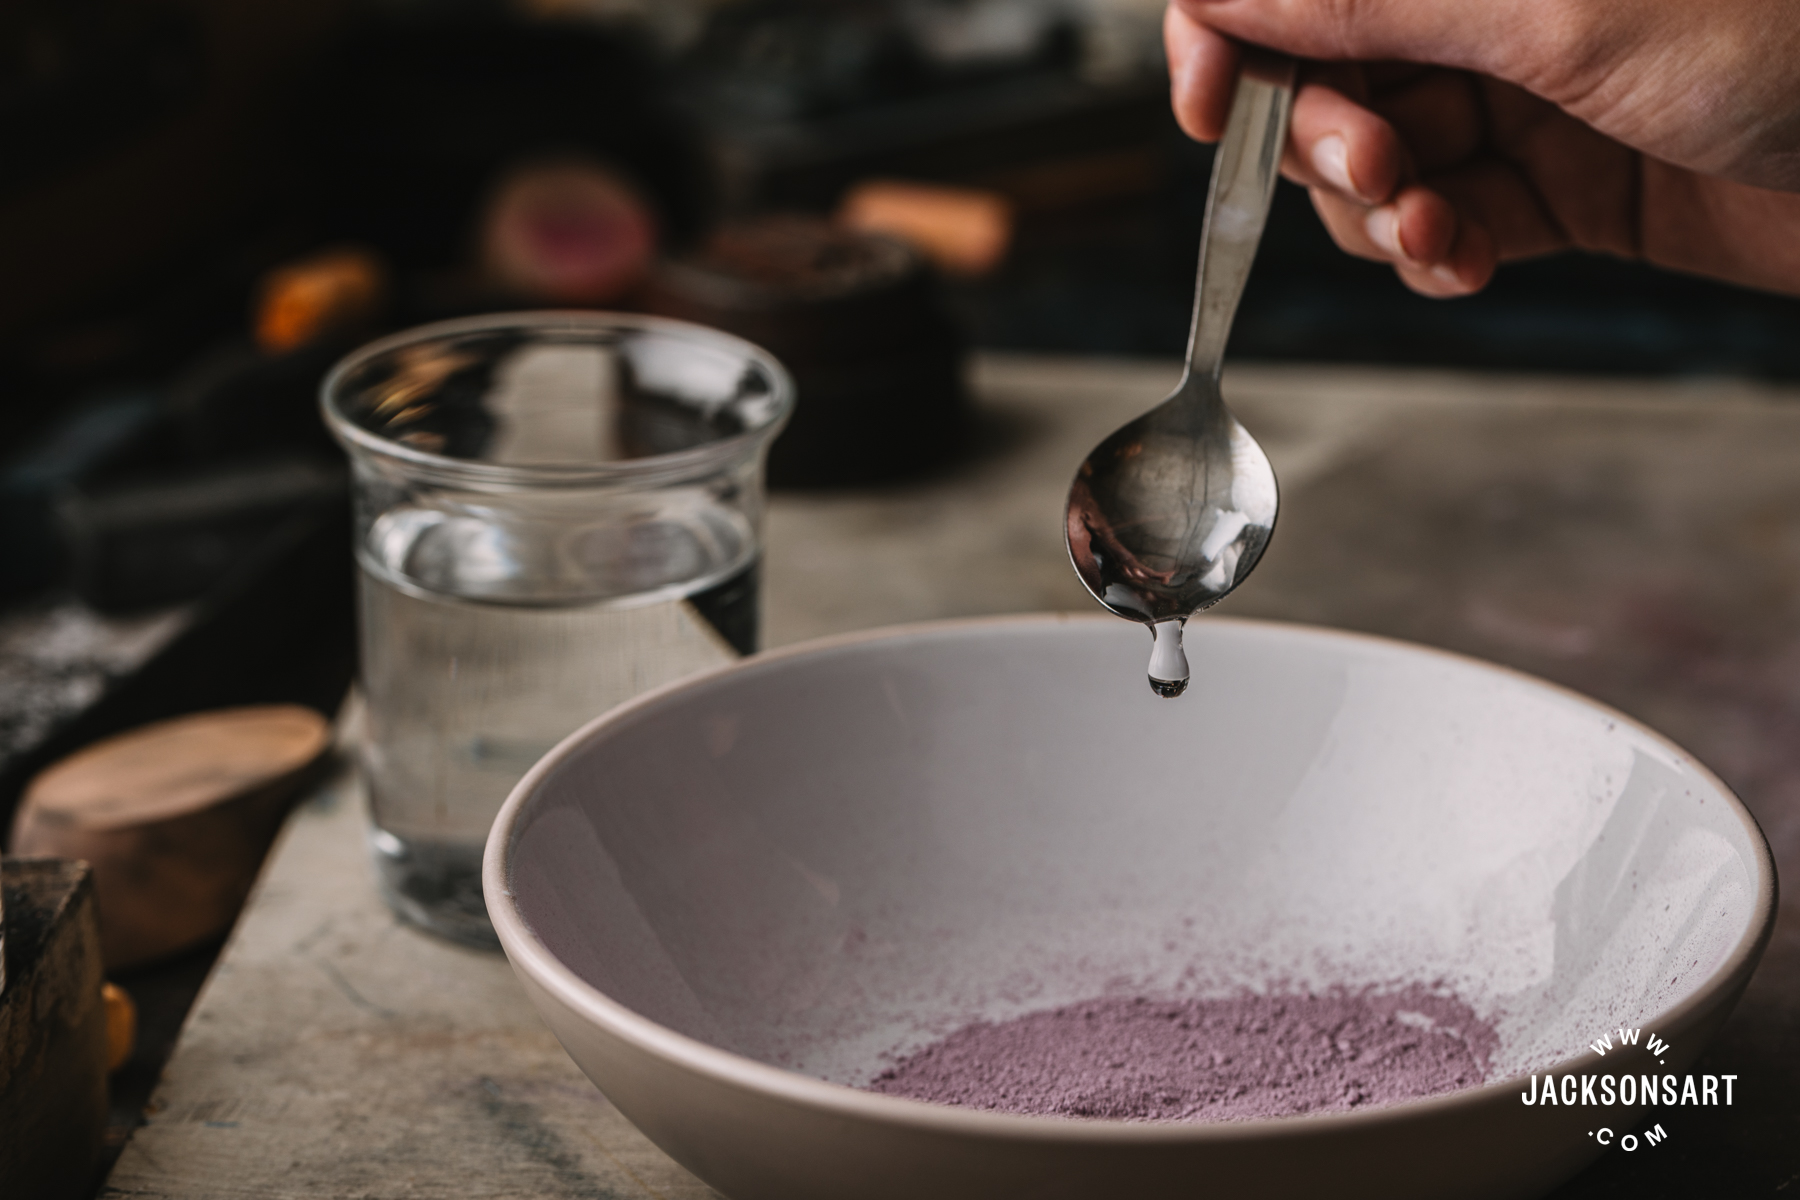
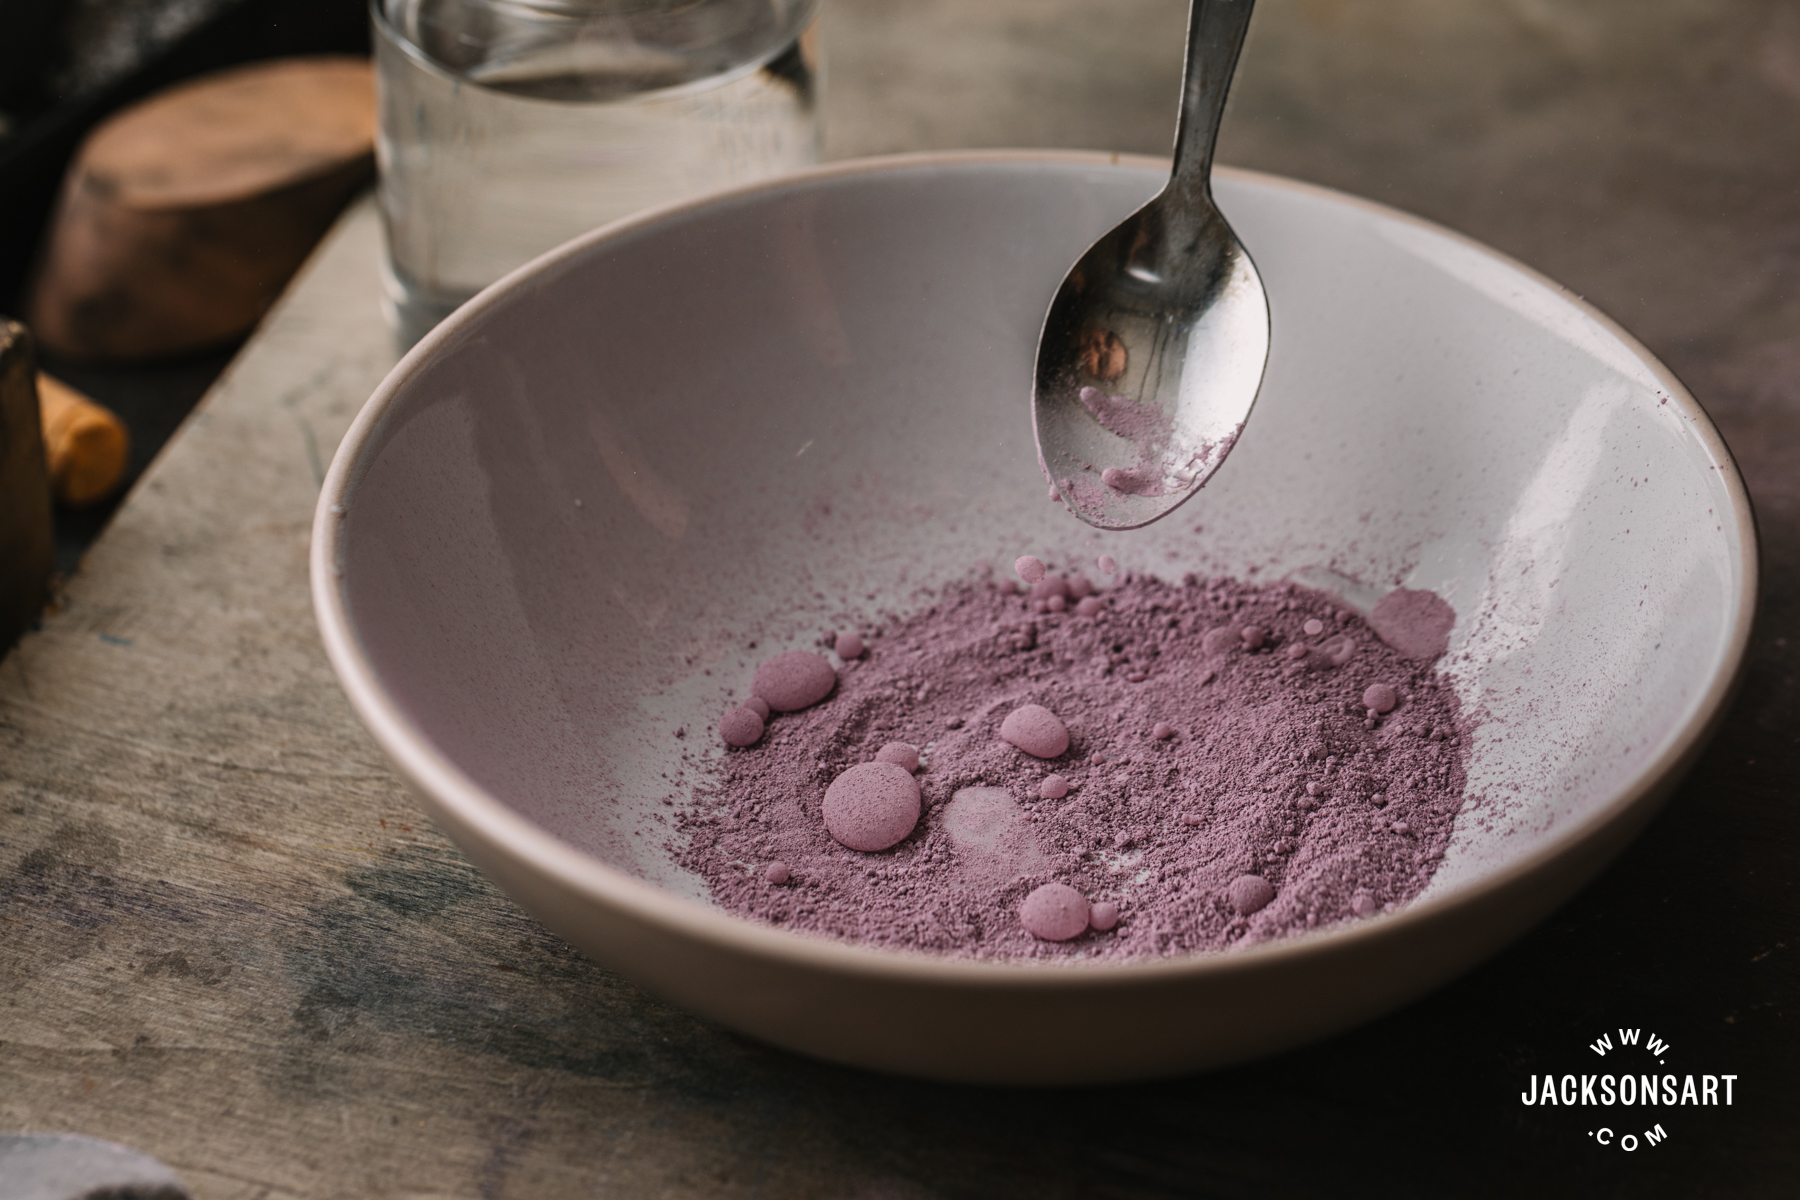
Step 4. The soft pastel dust was not particularly soluble with water. Instead of sinking or soaking up the water, the dust sat below the droplets of water and remained completely dry. This is because of the surface tension of the water. When mixing with a teaspoon, I found that the dust did not absorb the water easily at all. It was much more effective to mix the water into the dust using my fingers. It was a messy process (I opted to wear some thin protective gloves) but it allowed me to press the water into the dust much easier and create the appropriate consistency.
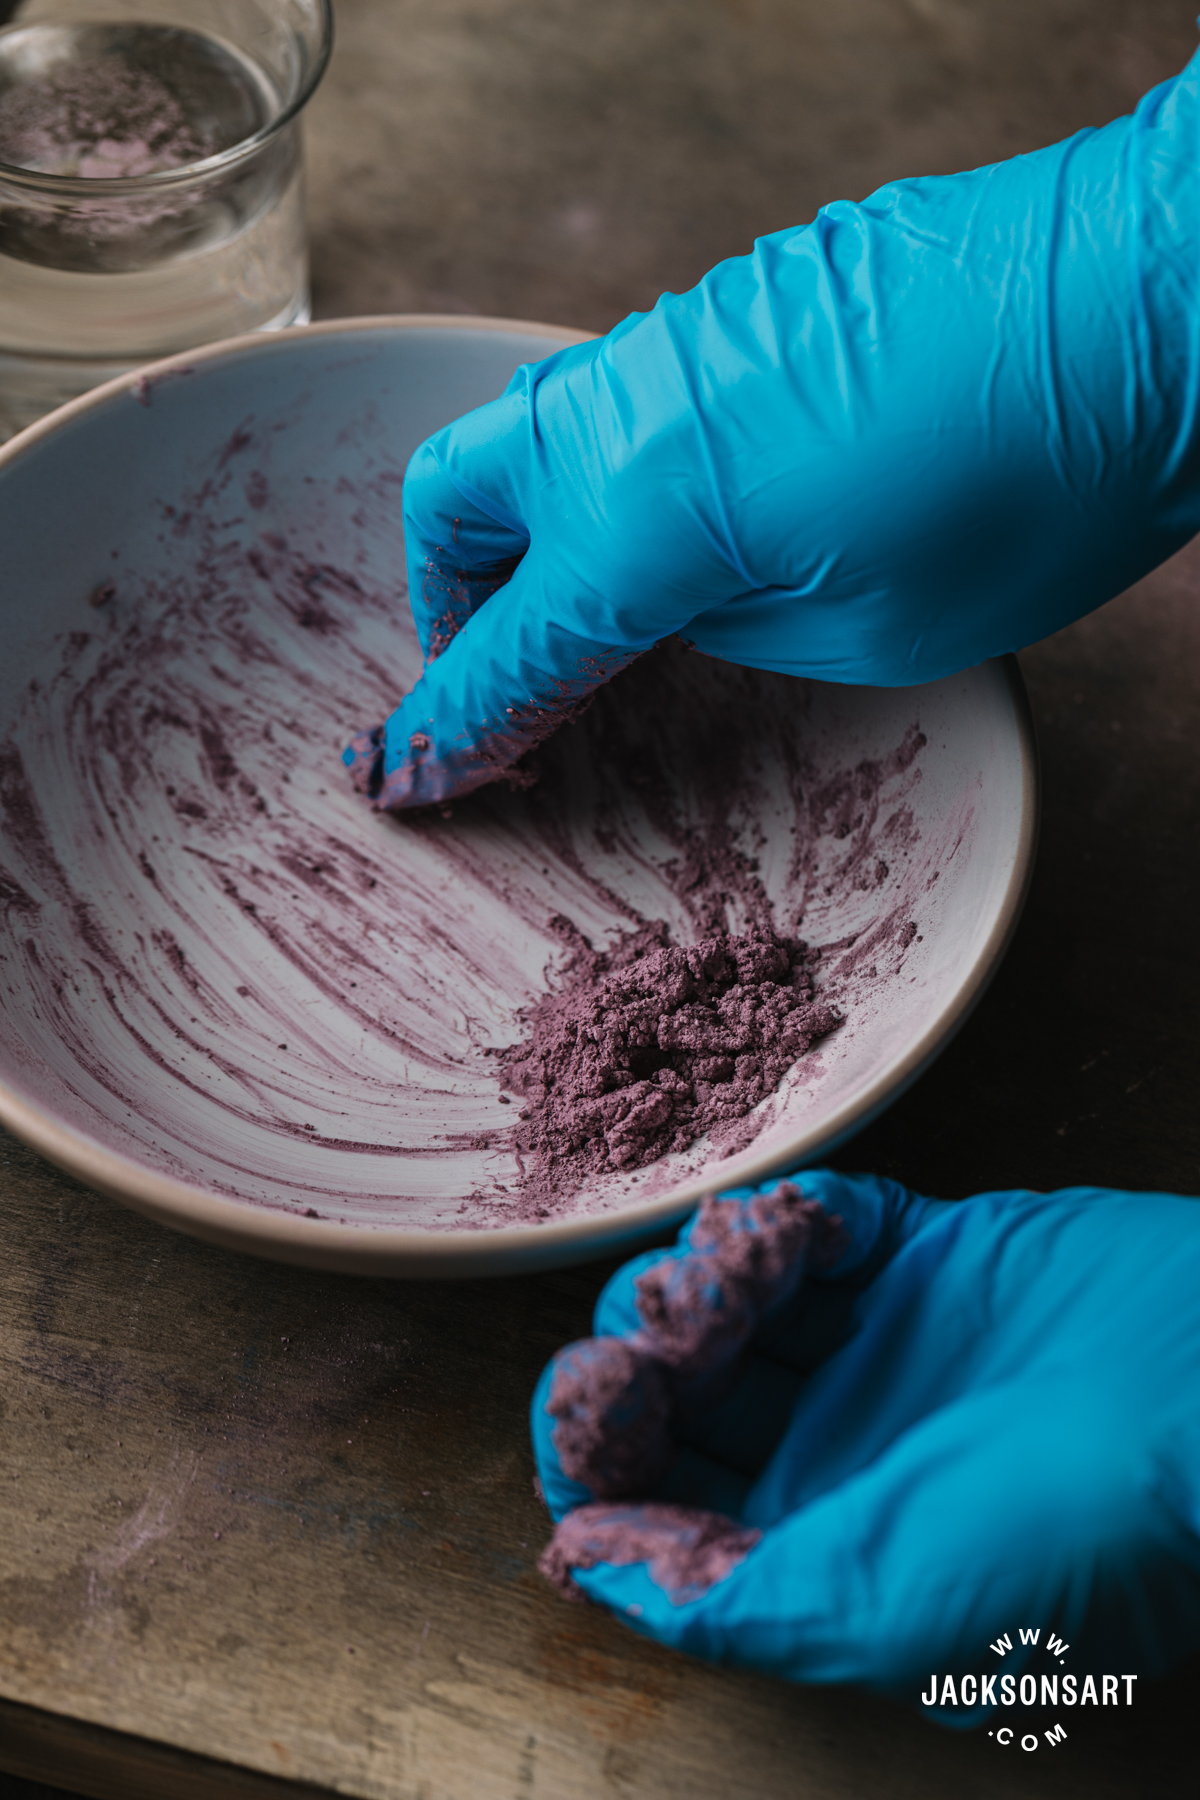
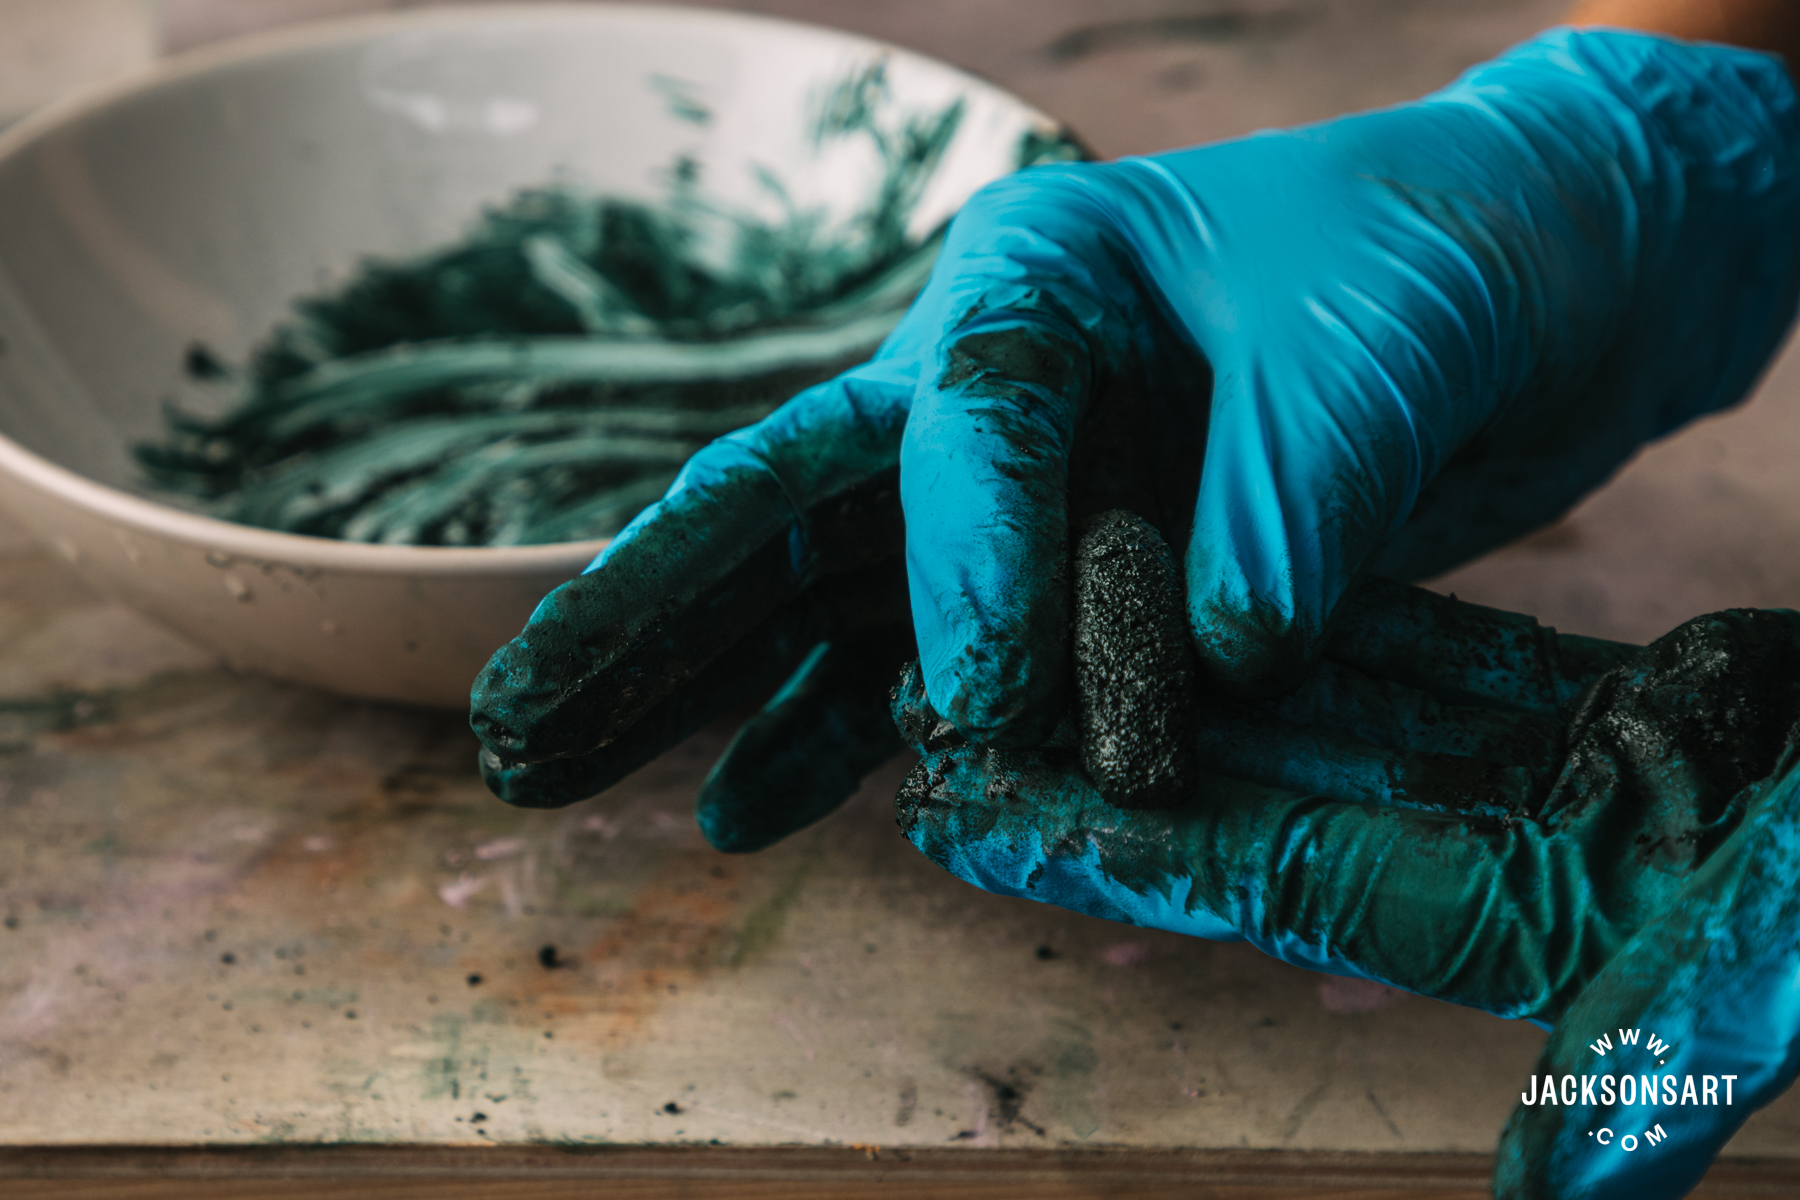
Step 5. Once I had a thick paste, I placed it into the palm of my hands and used my fingers to roll it together, a bit like clay or plasticine. It’s worth noting that it can be easy at this point to lose a lot of the material, and as a result the reshaped stick can become noticeably smaller than the original unbroken one. I found it was better to add slightly more water to gather up as much of the dust as possible. If I had added too much water, I could have always left the mixture to dry for a short while – perhaps 15 minutes or so – before attempting to reshape.
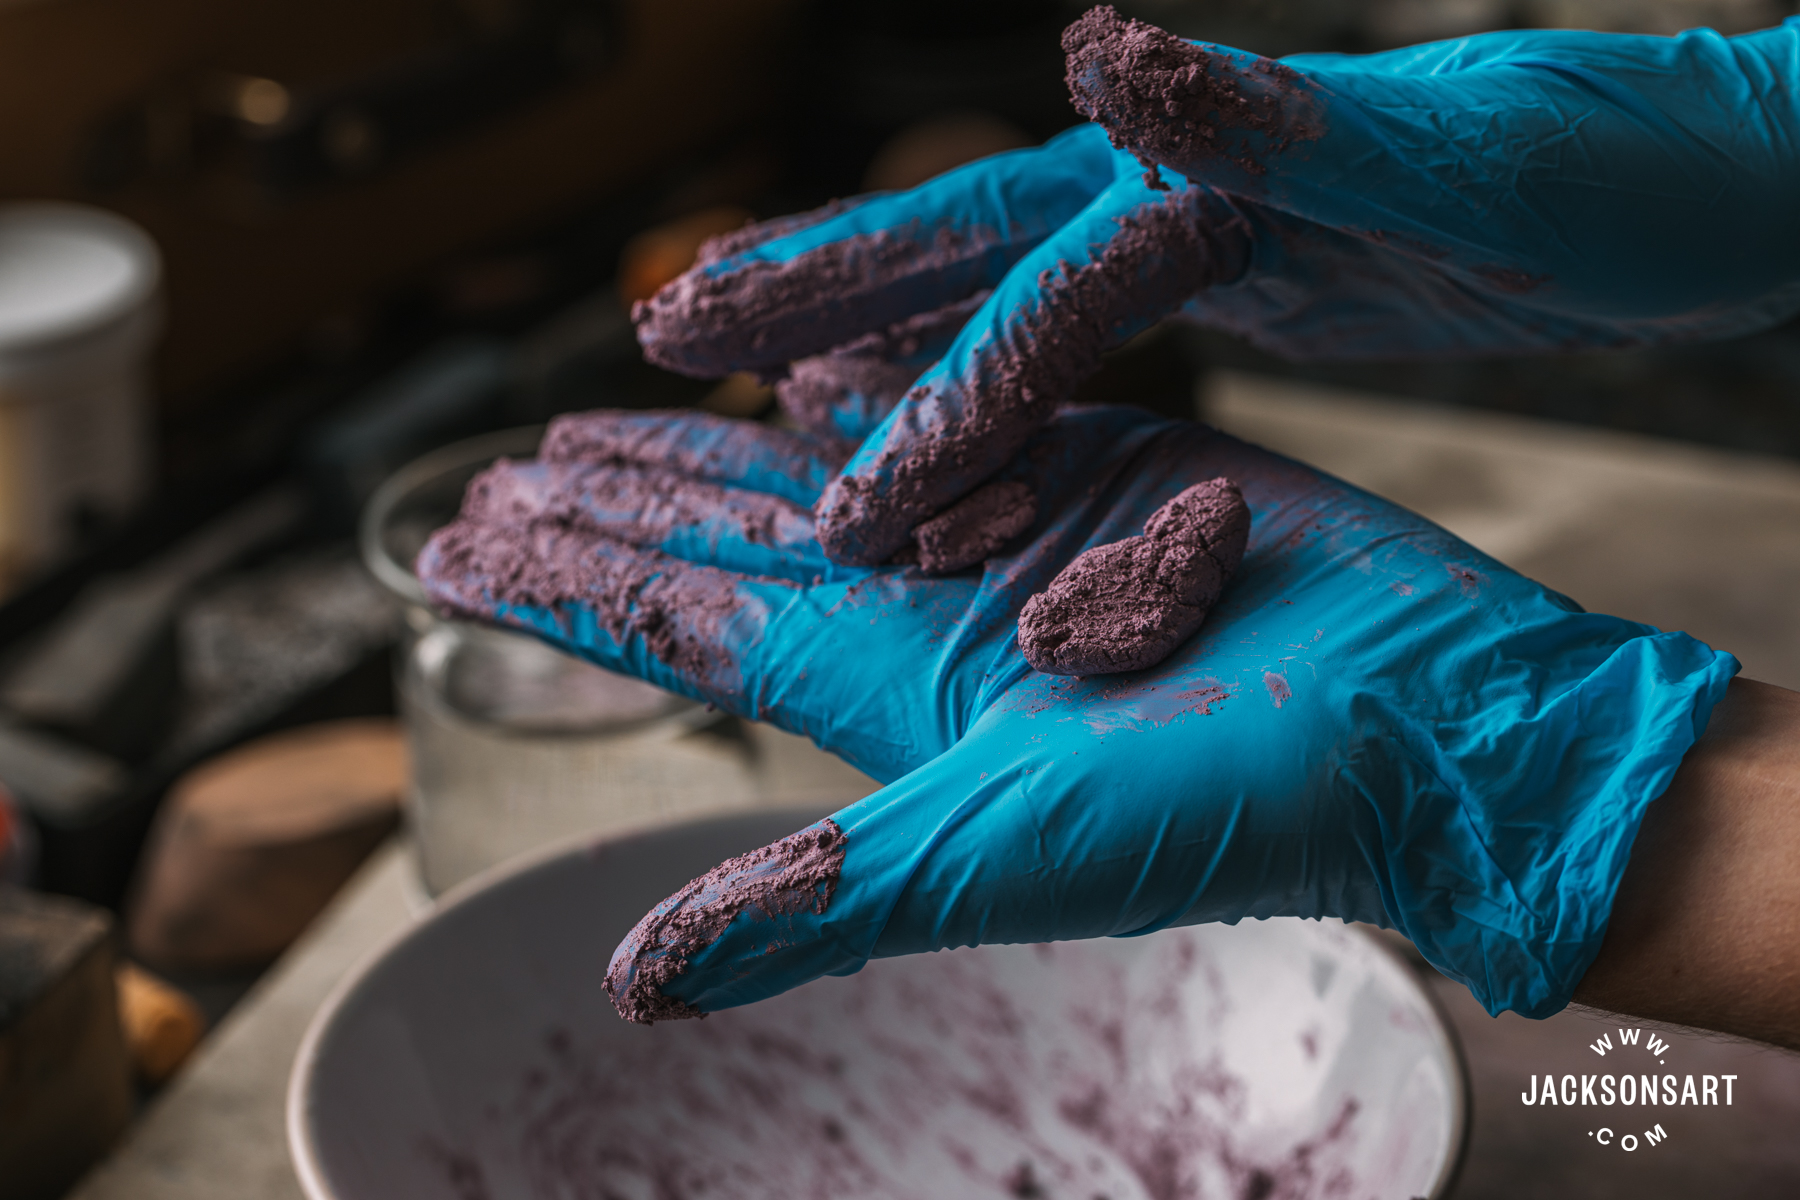

Step 6. Once I was happy that I had reshaped the mixture into a stick shape, I placed it gently on a paper towel on a flat surface. To try and get the most uniform shape possible, I also tried pressing my ‘new’ stick into some spare foam pastel packaging (the kind found in new pastel boxes). However, there wasn’t much difference in the result, so using my fingers alone in the absence of a foam insert did the trick.
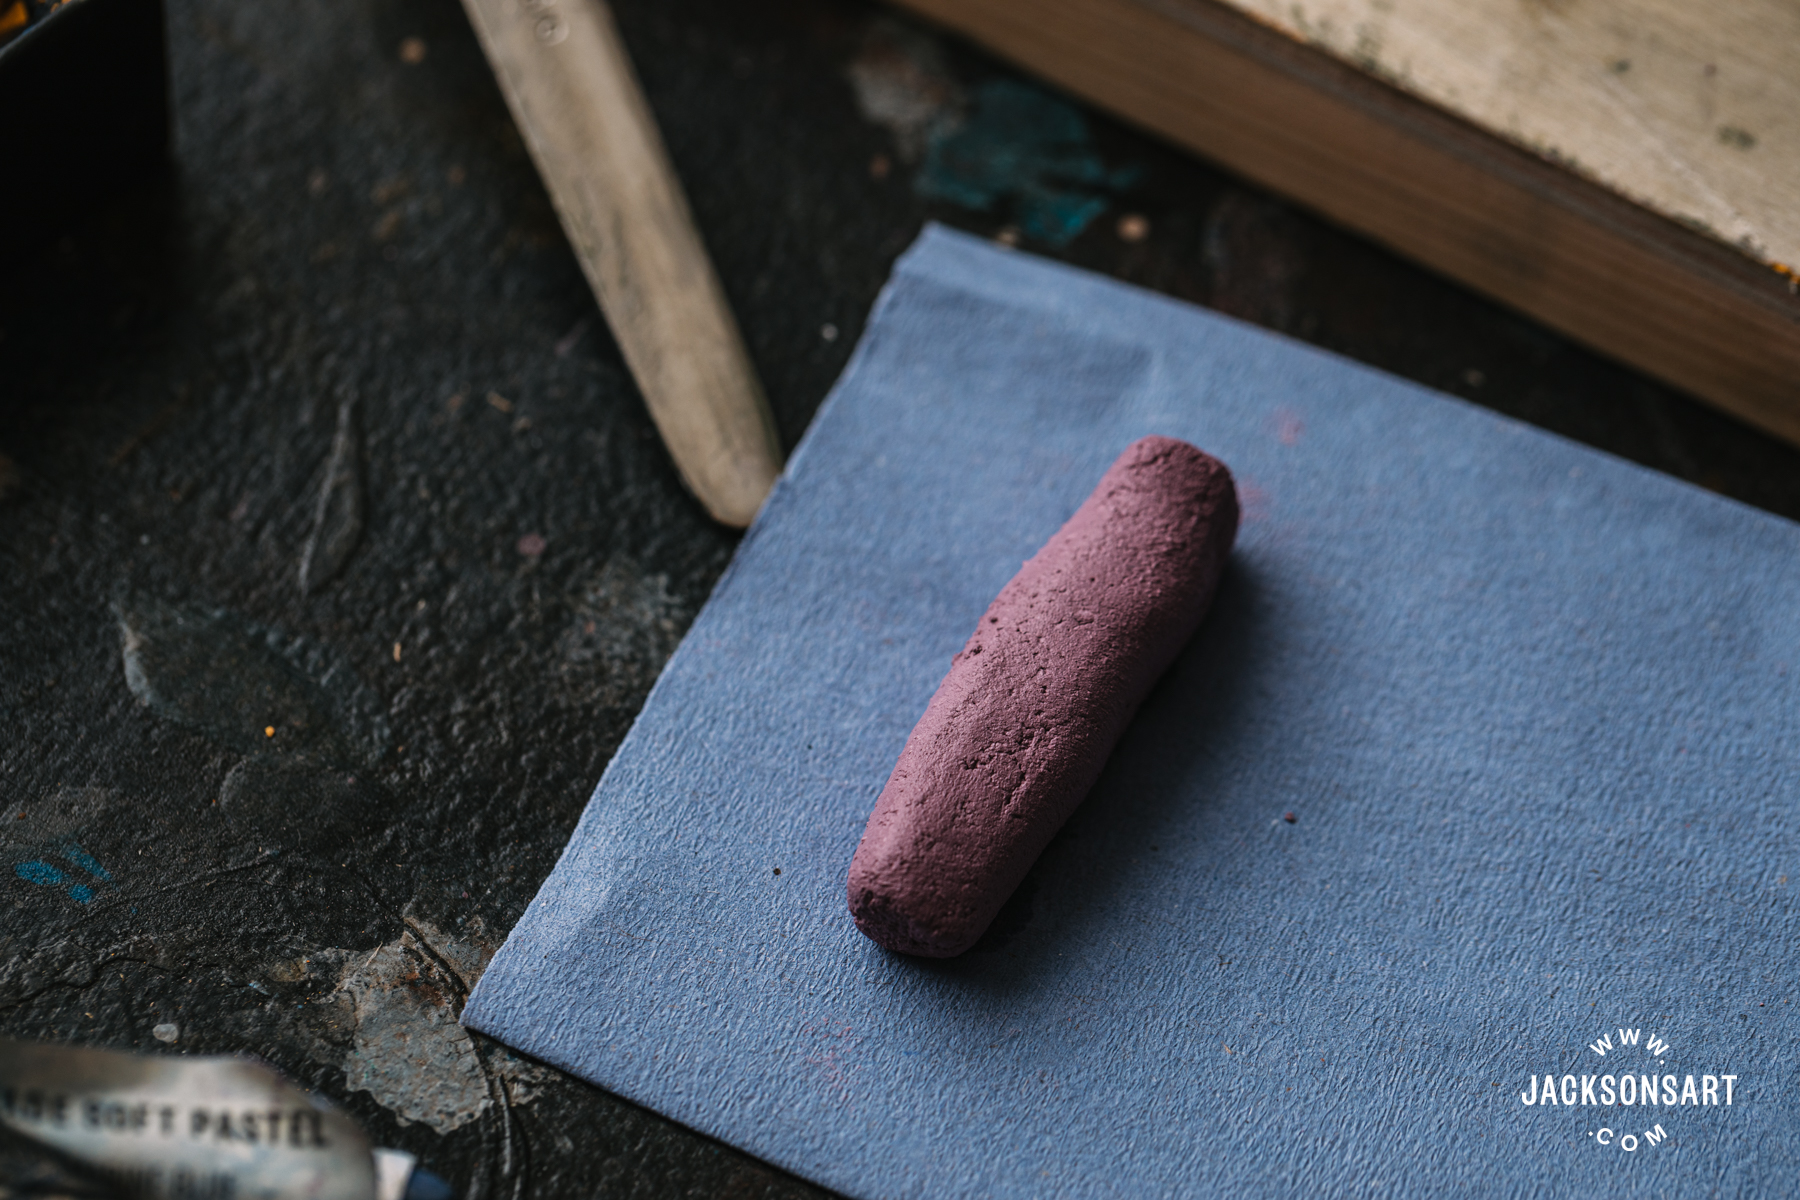
Step 7. I then left the pastel stick in a warm place to dry overnight. It was particularly warm weather during the time of my experiments, so I found leaving the pastels on a windowsill worked well and they were completely dry by morning.

Soft pastels sticks moulded with water (left) and alcohol (right).
Results of Using Water to Repair Broken Soft Pastels
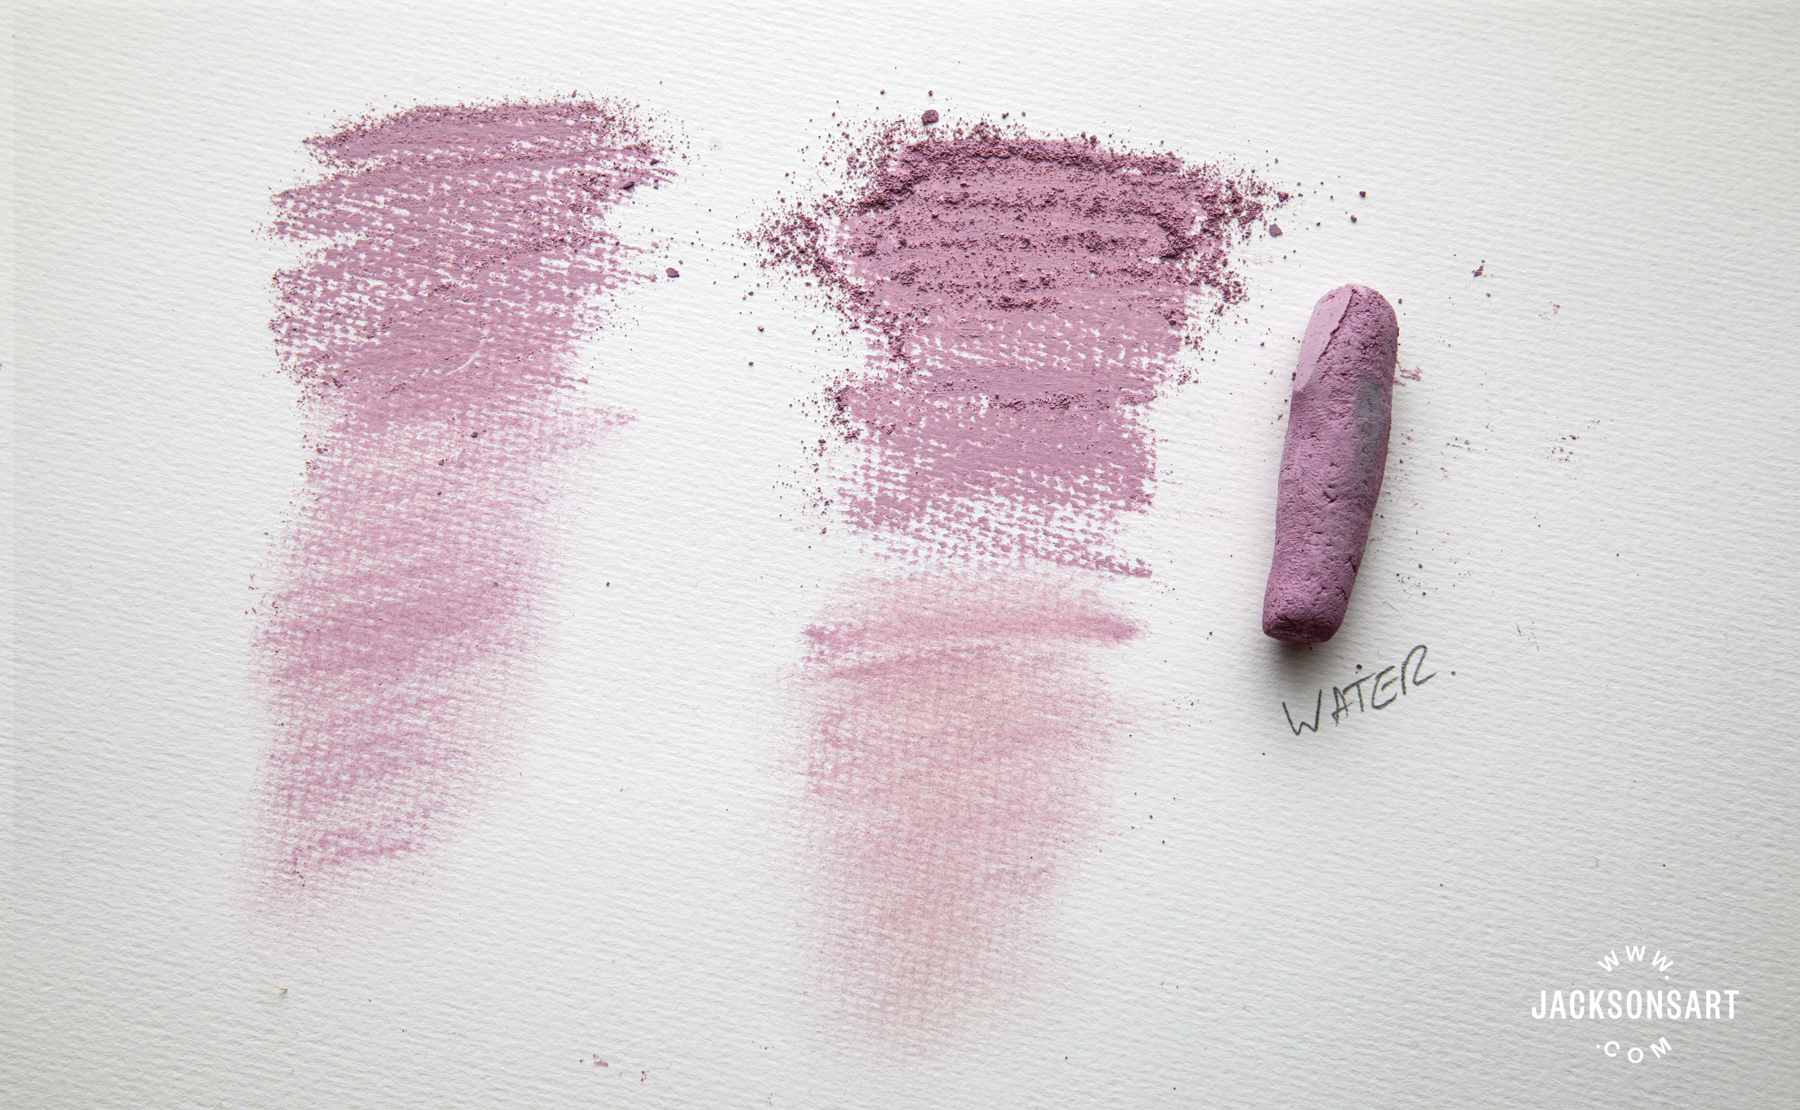
Overall, this method did result in a reformed solid soft pastel stick. The stick didn’t look like a new pastel, but it did dry out and was able to be picked up and applied to a surface. The results in the photographs below show that there was little to no change in terms of colour.
Violet Pink
As mentioned, the Violet Pink pastel broke down easier but was very slightly clumpier than the Chromium Oxide Green. Once mixed with the water it acted like clay and was very easy to reshape in my hands. It dried as expected and the reshaped stick remained intact. As you can see in the image, the pastel does seem powderier on the paper after being repaired which suggests it may not be as durable as before, however I was still able to use it as normal. There was no change in the colour.
L – R: Drawing with the Violet Pink Soft Pastel before and after repairing with water.
Chromium Oxide Green
The Chromium Oxide Green was tougher to crush into dust, but once I’d managed this, it created a very smooth mixture with the water which was easy to reshape. Similarly to the Violet Pink, the Chromium Oxide Green resulted in a usable pastel stick.

L – R: Drawing with the Chromium Oxide Green Soft Pastel before and after repairing with water.
Method Two – Using Alcohol to Repair Broken Soft Pastels
This method repeats the exact process in steps above, apart from instead of adding water to the pastel dust, I added an isopropyl alcohol solution (also known as isopropanol or ‘rubbing alcohol’).
A solution with an alcohol content between 70-99.9% will work, however a purer solution will give better results as you want to avoid anything with additives or oils. I managed to find a solution of 99.9% in my local hardware store.
The alcohol soaks into the pastel dust much easier than the water and I was able to mix it with a spoon. When reshaping the alcohol mixture paste into a stick, it is vital to wear protective gloves, as the alcohol is a harmful irritant to skin.

I found that the alcohol mixture felt more moist than the water one, and as a result it could be harder to form it into a uniform shape. However, it seemed to dry much quicker than the water tests.

Top to Bottom: Violet Pink moulded with water, then alcohol. Chromium Oxide Green moulded with water, then alcohol.
Results of Using Alcohol to Repair Broken Soft Pastel
Violet Pink
The Violet Pink mixed easily with the alcohol solution and was simple to reshape. The colour of the stick did appear slightly darker than the water-based one. However, once dry and used on paper there was no visible change in the colour pigment. This stick felt grittier than the one fixed with water.

L – R: Drawing with the Violet Pink Soft Pastel before and after repairing with alcohol.
Chromium Oxide Green
The Chromium Oxide Green mixed well with the alcohol in the bowl however it was much harder to reshape into a stick. It became clumpy and separated in my hand, resulting in a less uniform shape and a few worrying cracks. Once dry and used on paper the pastel stick did remain intact, however it was very gritty – more so than the Violet Pink. Again, there was no change in how the colour appeared on paper.

L – R: Drawing with the Chromium Oxide Green Soft Pastel before and after repairing with alcohol.
Overall, it seems the pastels fixed with water provided better, smoother and more consistent results. Like Hazel from Unison Colour mentioned, the darker shade did produce a scratchier fixed pastel, especially in the case of the alcohol-based experiment.
Alternatives to Repairing Broken Soft Pastels and Tips for Avoiding Breakage
A way to ensure that your soft pastel sticks last longer is to preserve them. Using a box with foam inserts protects the pastels from knocking into each other while being transported. You’re much more likely to have a box of unbroken pastels if you use one of these as opposed to keeping them loose inside a container.

While using your pastels, avoid applying too much pressure from your fingers. Soft pastels are purposefully powdery, meaning it does not take much to transfer the pigment onto the surface. Try using light strokes to avoid any breakage. However, sometimes a broken pastel is just an unavoidable part of using soft pastel sticks. Hazel from Unison Colour made another suggestion of how to repurpose your broken pastels:
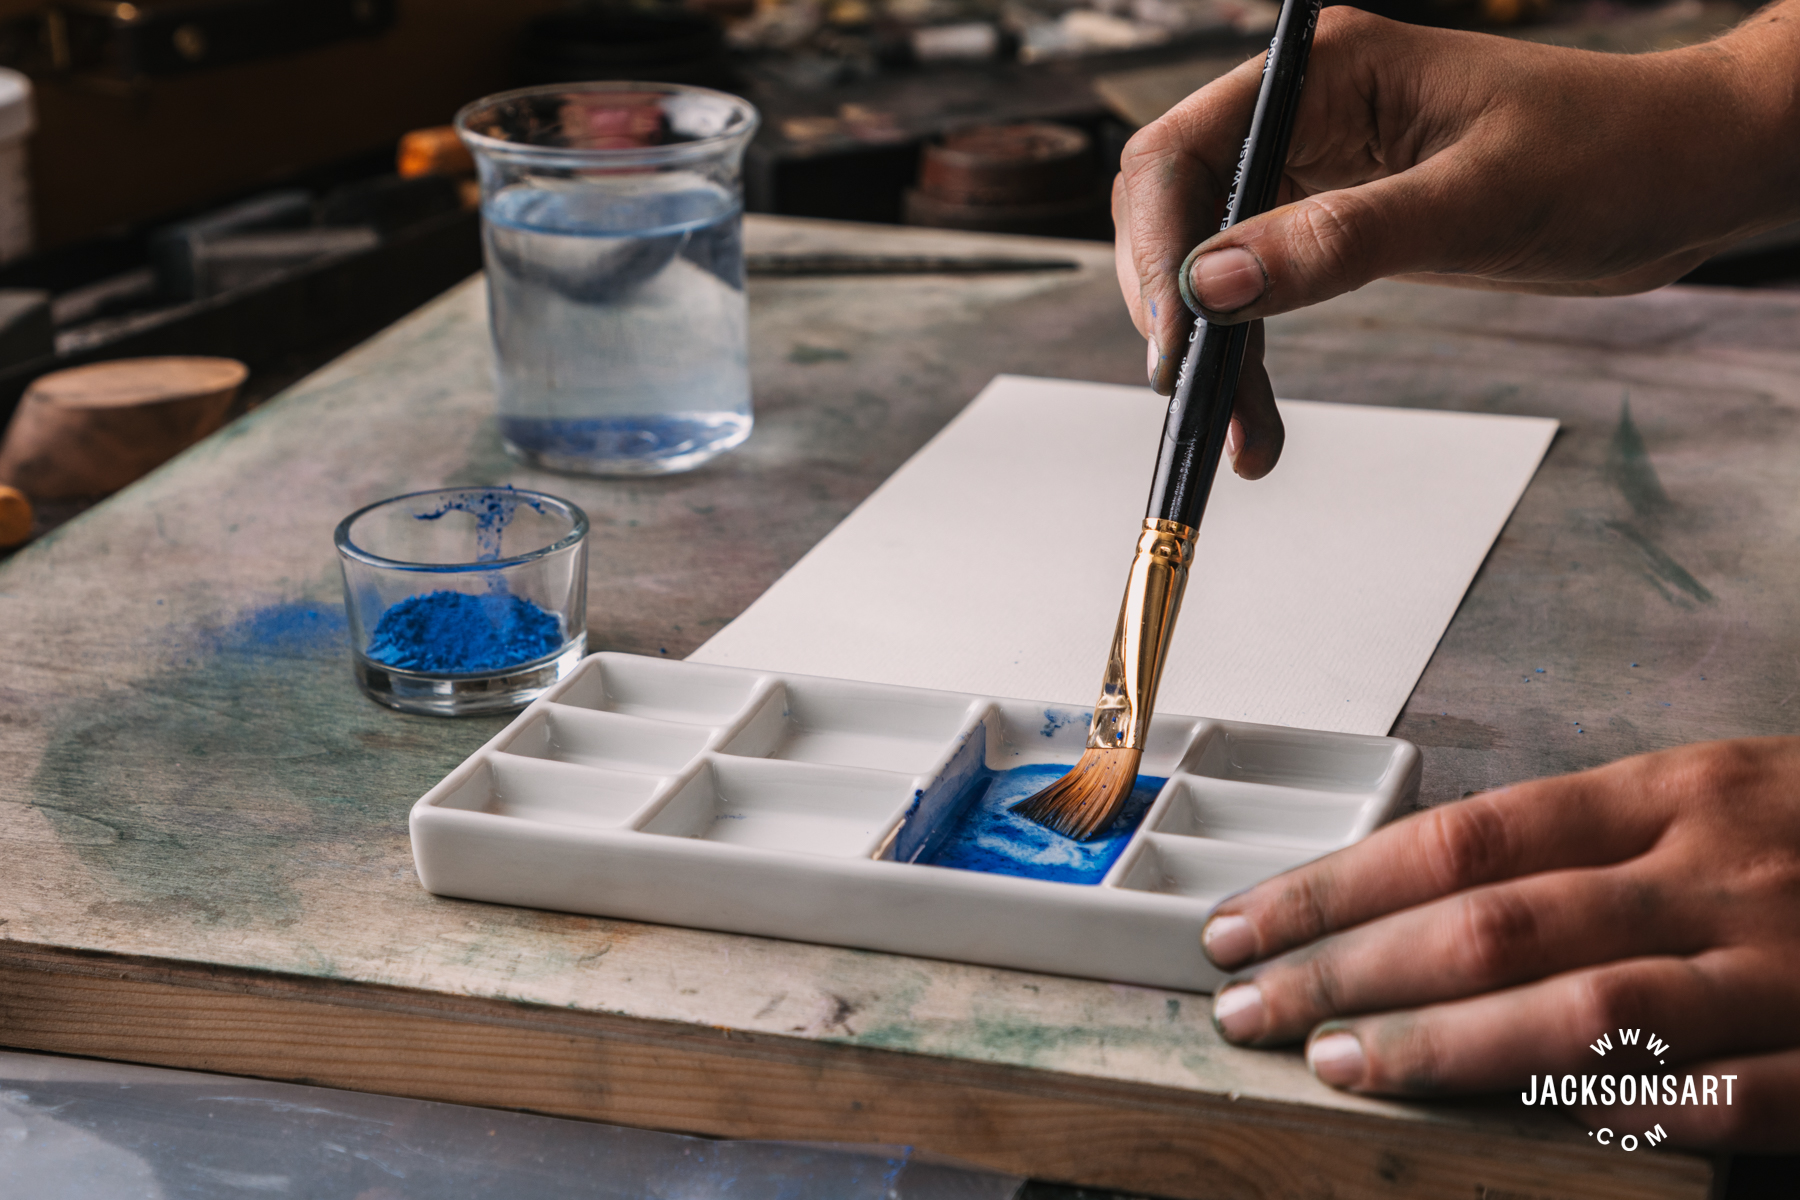
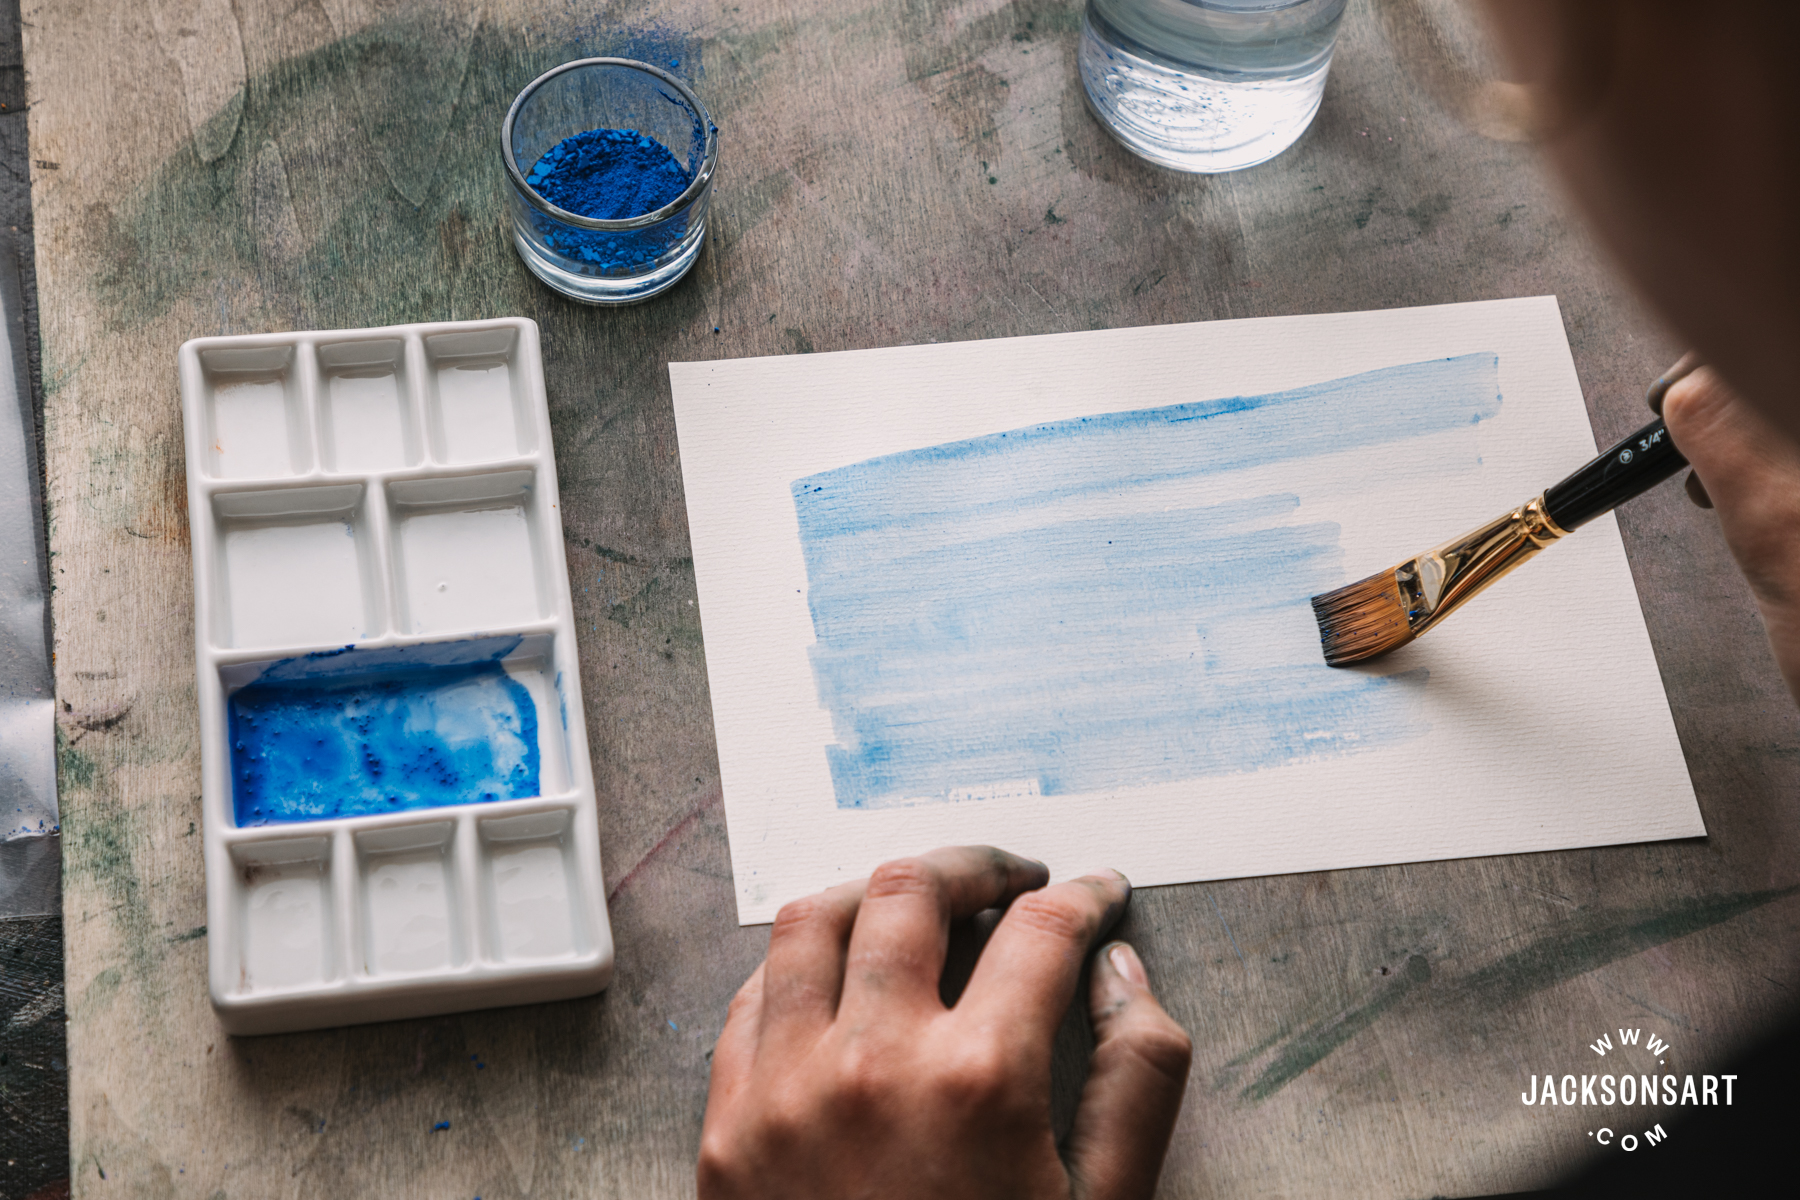
“For an alternative use of broken pastels, they can be transformed into a watercolour medium. By simply grinding them up and adding a little water they are ideal to use as an under wash for pastel work or by using a fine brush to add detail to your artwork.”
– Hazel, Quality Controller at Unison Colour
I tried this out by putting my broken pastel in a container, and using a bit of water to mix a small amount of it on a palette. I used enough water to break down and soak up any larger clumps of the dust on the palette before applying it to the paper. Once sufficiently mixed, I used a soft flat brush to create a brightly coloured, smooth wash.
Overall, these methods gave relatively satisfactory results. While not producing ‘good-as-new’ soft pastels, the experiments proved it is possible to reform a broken pastel stick and reuse it. However, different colours seem to behave differently, making it unpredictable as to whether it is worth your time to go through this process. Taking precautions and repurposing your pastels may be a less time-consuming option overall. However, if you find yourself with an excess of coloured dust in the bottom of your pastel box, I’d be interested to hear how these methods worked for you. Or if you have any entirely different methods of your own, feel free to share your thoughts with us in the comments below.
Further Reading
How to Fix Broken Panpastels
In Conversation With Nina Squire About Unison Colour Pastel
Everything You Need to Know About Pastel Paper
Using Soft Pastels for Observational Drawing
Shop Soft Pastels at jacksonsart.com


